

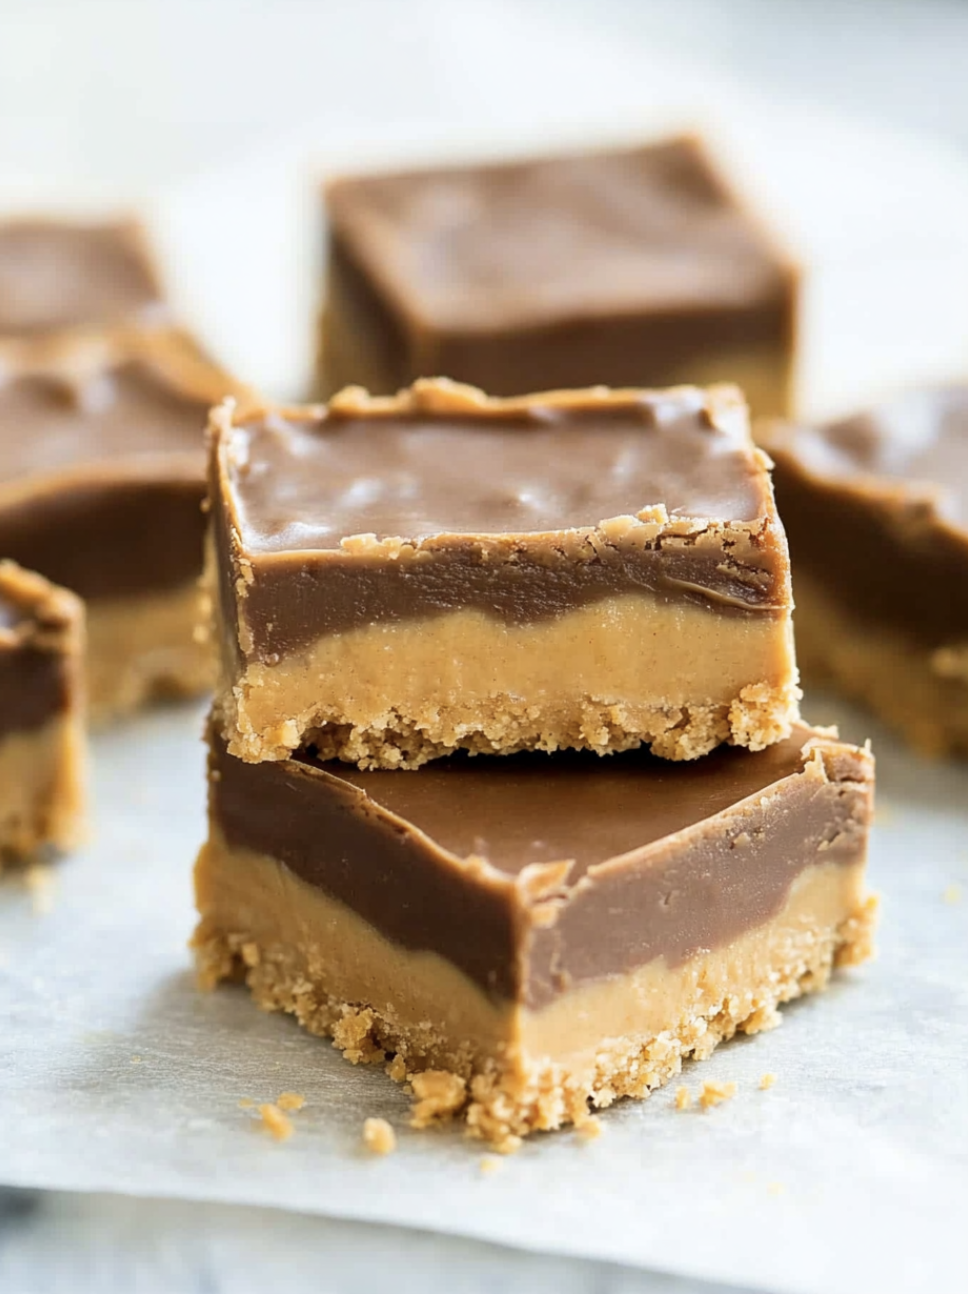
If you’re seeking a quick, indulgent treat without turning on the oven, these Easy No Bake Peanut Butter Bars are your answer. With a rich, satisfying texture and a harmonious blend of peanut butter and chocolate, this recipe is a must for any dessert lover.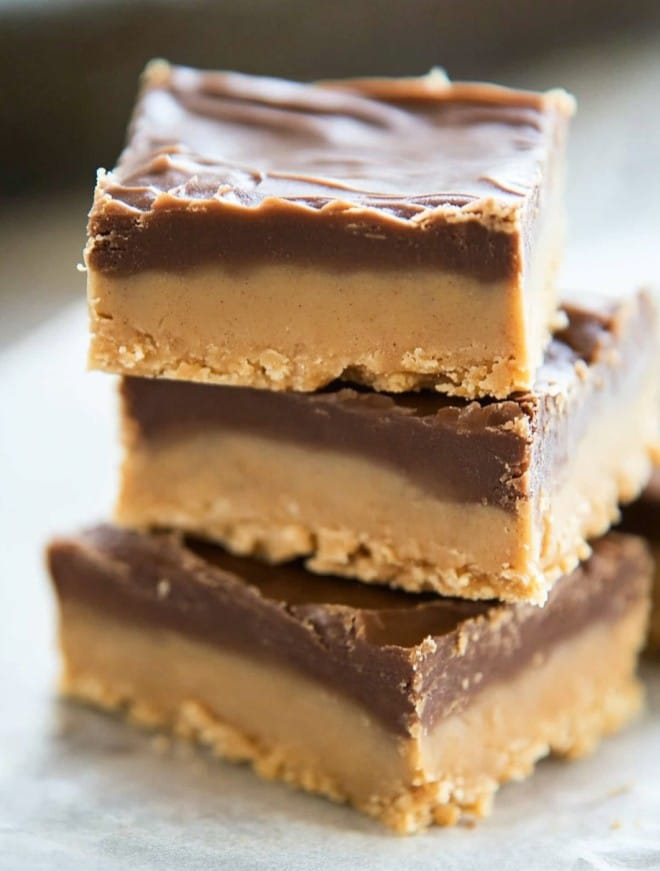
- Cuisine: American
- Prep Time: 15 minutes
- Cook Time: 0 minutes
- Total Time: 1 hour 15 minutes (including chilling time)
- Servings: 16 bars
Here’s a great video that shows the process of making no-bake peanut butter bars.
Why You’ll Love This Recipe
-
Incredibly Easy: With just five simple ingredients and about 15 minutes of prep time, you can whip up a dessert that tastes like it took hours to make.
-
No Oven Needed: This is the perfect recipe for warm days when you want to keep the kitchen cool. It’s also great for holidays when oven space is at a premium.
-
Minimal Cleanup: Since everything is mixed in just a couple of bowls, you won’t be left with a sink full of dishes.
-
Crowd-Pleasing Flavor: The classic combination of peanut butter and chocolate is a guaranteed hit with both kids and adults, tasting remarkably like a Reese’s Peanut Butter Cup.
Ingredients
-
1 cup (2 sticks) unsalted butter, melted: This acts as the binding agent and adds a rich, melt-in-your-mouth texture. If you only have salted butter, you can use it, but you may want to omit any additional salt.
-
2 cups graham cracker crumbs: These provide the base with a classic, slightly sweet crunch. You can buy pre-made crumbs or make your own by crushing approximately 16 full sheets of graham crackers in a food processor or a sealed bag with a rolling pin.
-
2 cups powdered sugar (confectioners’ sugar): This ingredient is crucial for sweetening the bars and helping them firm up to a fudgy consistency. For the smoothest texture, sift the sugar to remove any lumps.
-
1 cup creamy peanut butter: For best results, use a commercial brand of no-stir creamy peanut butter. Natural peanut butters where the oil separates can result in a softer, greasier texture.
-
1 ½ cups milk chocolate chips: This creates a sweet, silky topping that complements the peanut butter base perfectly.
-
¼ cup creamy peanut butter: Adding a bit of peanut butter to the melted chocolate not only enhances the flavor but also helps the topping set with a softer, crack-free finish.
How to Make It
1. Prepare the Pan: Line a 9×13 inch pan with parchment paper, leaving some overhang on the sides to act as “handles.” This will make it much easier to lift the bars out for clean slicing later. For thicker bars, you can use a 9×9 inch pan.
2. Form the Base: In a medium bowl, combine the melted butter, graham cracker crumbs, powdered sugar, and 1 cup of peanut butter. Mix thoroughly until all the ingredients are well-blended and no dry spots of powdered sugar remain. The mixture will be thick.
3. Press the Base: Transfer the peanut butter mixture to your prepared pan. Using a spatula or the back of a spoon, press the mixture firmly and evenly into the bottom of the pan. A flat-bottomed glass can also help create a compact, even layer.
4. Prepare the Chocolate Topping: In a microwave-safe bowl, combine the milk chocolate chips and the remaining ¼ cup of peanut butter. Microwave in 30-second intervals, stirring well after each one, until the chocolate is melted and the mixture is smooth. Be careful not to overheat the chocolate.
5. Assemble and Chill: Pour the melted chocolate mixture over the pressed peanut butter base and spread it into an even layer with a spatula.
6. Set the Bars: Refrigerate the pan for at least one hour, or until the chocolate is firm. For the cleanest cuts, let the bars sit at room temperature for a few minutes before slicing so the chocolate doesn’t crack.
Recipe Variations
-
Add Some Crunch: Mix in ½ cup of crispy rice cereal with the peanut butter base for added texture.
-
Change the Base: Instead of graham crackers, try using crushed vanilla wafers, Biscoff cookies, or even pretzels for a sweet and salty twist.
-
Experiment with Toppings: Use semi-sweet or dark chocolate chips for a richer, less sweet finish. You can also sprinkle the top with flaky sea salt, chopped peanuts, or sprinkles before chilling.
Recipe FAQs
Can I use natural peanut butter in this recipe?
It’s best to use a commercial, no-stir peanut butter for this recipe. The oil in natural peanut butter tends to separate, which can make the bars too soft or greasy and prevent them from setting up properly.
What should I do if my chocolate becomes grainy or seizes while melting?
This usually happens if the chocolate is overheated or comes into contact with water. To prevent this, melt the chocolate slowly in short intervals in the microwave. If it does seize, you can sometimes save it by stirring in a teaspoon of vegetable oil or melted coconut oil until it becomes smooth again.
How should I store the peanut butter bars?
Store the bars in an airtight container in the refrigerator for up to one week. You can also freeze them for up to three months. For easier serving, slice the bars before freezing and place parchment paper between the layers to prevent them from sticking together.
Easy No-Bake Peanut Butter Bars
Ingredients
- 1 cup Melted Unsalted Butter
- 2 cups Graham Cracker Crumbs
- 2 cups Powdered Sugar
- 1 cup Creamy Peanut Butter
- 1 ½ cups Milk Chocolate Chips
- ¼ cup Creamy Peanut Butter
Instructions
- Prepare the Pan: Line a 9×13 inch pan with parchment paper, leaving some overhang on the sides to act as “handles.” This will make it much easier to lift the bars out for clean slicing later. For thicker bars, you can use a 9×9 inch pan.
- Form the Base: In a medium bowl, combine the melted butter, graham cracker crumbs, powdered sugar, and 1 cup of peanut butter. Mix thoroughly until all the ingredients are well-blended and no dry spots of powdered sugar remain. The mixture will be thick.
- Press the Base: Transfer the peanut butter mixture to your prepared pan. Using a spatula or the back of a spoon, press the mixture firmly and evenly into the bottom of the pan. A flat-bottomed glass can also help create a compact, even layer.
- Prepare the Chocolate Topping: In a microwave-safe bowl, combine the milk chocolate chips and the remaining ¼ cup of peanut butter. Microwave in 30-second intervals, stirring well after each one, until the chocolate is melted and the mixture is smooth. Be careful not to overheat the chocolate.
- Assemble and Chill: Pour the melted chocolate mixture over the pressed peanut butter base and spread it into an even layer with a spatula.
- Set the Bars: Refrigerate the pan for at least one hour, or until the chocolate is firm. For the cleanest cuts, let the bars sit at room temperature for a few minutes before slicing so the chocolate doesn’t crack.
Notes
- Add Some Crunch: Mix in ½ cup of crispy rice cereal with the peanut butter base for added texture.
- Change the Base: Instead of graham crackers, try using crushed vanilla wafers, Biscoff cookies, or even pretzels for a sweet and salty twist.
- Experiment with Toppings: Use semi-sweet or dark chocolate chips for a richer, less sweet finish. You can also sprinkle the top with flaky sea salt, chopped peanuts, or sprinkles before chilling.


hey Sandra Clare is this ok if I swap the chocolate for something not so sweet? kids cant have too much sugar before bed thanks
looks easy enough that even i could make it, not much of a baker usually stick to the grill
gonna try with almond butter instead, allergic to peanuts lol
Can I use a vegan alternative to the ingredients mentioned in the recipe? Would appreciate your advice, Sandra Clare.
This looks like the perfect snack for my mid-afternoon slump. Can’t wait to try it!
if i make this, it’ll be the first thing i didnt burn in the kitchen haha
Interesting to ponder how recipes like this have evolved over time. From simple ingredients to the complex flavors we enjoy today.
reminds me of a dessert i had in Belgium, though that had way more chocolate
Could a robot be programmed to make this recipe, you think?
Interesting idea, BettyBot. With current tech, simple repetitive tasks are possible.
Looks way too calorific for my diet, no thanks.
omg this is heaven for a sweet tooth like me, gotta try!
Love the simplicity. Reminds me of what my grandmother used to make.
sweet, looks easy to make during a game break. nice one Sandra!
gonna make this and pretend I’m on a cooking show lol
this looks delicious and so calming to make. can’t wait to try.
Could I incorporate any edible flowers into this recipe for a unique twist? Curious about your thoughts, Sandra.
total cost? always looking for affordable treats to make at home
whats a double boiler for melting chocolate? sorry new to cooking
bet it tastes nowhere as good as it looks
Interesting recipe. May try it.
if i can make this without starting a kitchen fire, it’ll be a miracle. here goes nothing lol
Using natural peanut butter can change the texture due to its oil separation. Keep that in mind if you’re substituting.
looks good but too much sugar for me, any alternatives?
You could try using a sugar substitute that fits your dietary needs. Check how it blends with the other ingredients.
super clear directions, can’t mess this up thanks!
this recipe is chill, easy to make and tasty
made this but forgot the chocolate, turned into a peanut butter snack instead lol