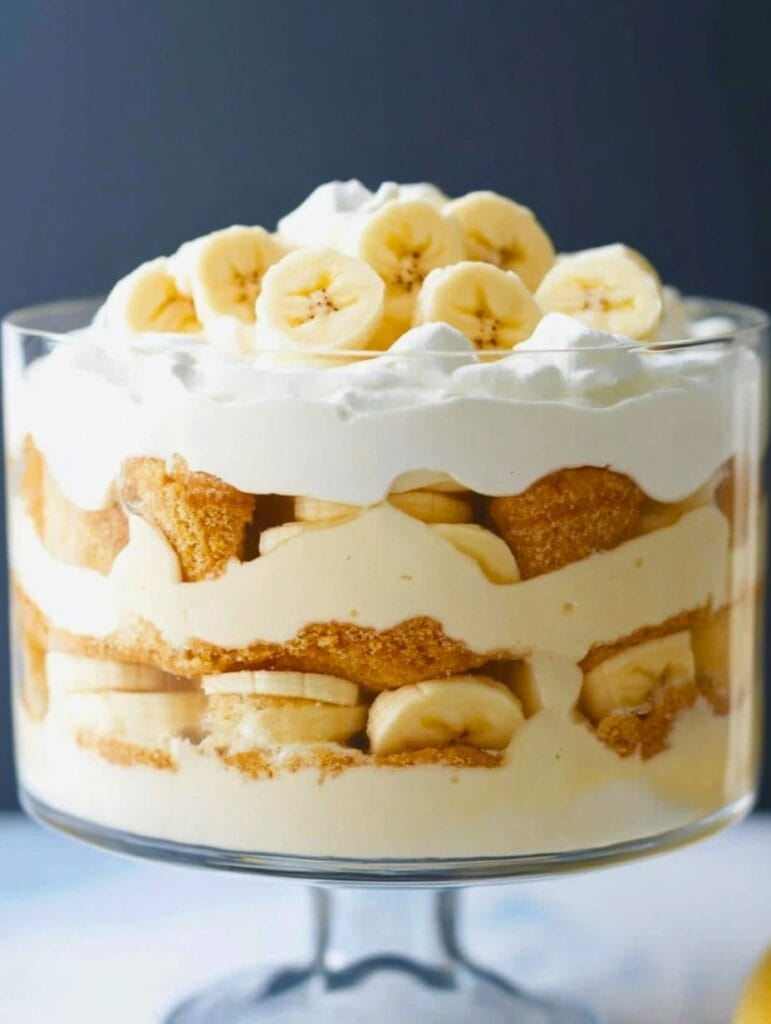
This classic banana pudding features layers of creamy vanilla pudding, fresh banana slices, and crisp vanilla wafers, all topped with a fluffy Cool Whip layer. It’s the ultimate no-bake dessert that’s easy to make and perfect for any occasion.

Cuisine: American
Prep Time: 30 minutes
Chill Time: 2 hours
Total Time: 2 hours 30 minutes
Servings: 10
Why You’ll Love Making It
- Quick & Easy – A simple, no-bake dessert that comes together in minutes.
- Rich & Creamy – The pudding layers are smooth, luscious, and perfectly balanced.
- Beginner-Friendly – No special techniques required—just mix, layer, and chill.
- Perfect for Gatherings – A crowd-pleasing dessert that gets better as it sits.
- Make-Ahead Friendly – Ideal for prepping in advance, as the flavors meld beautifully over time.
Ingredients
- Two (3.2 oz) packages instant vanilla pudding – Forms the creamy, flavorful base.
- 4 cups cold milk – Whole milk works best for a rich consistency, but 2% can be used.
- 8 oz Cool Whip – Adds lightness and a fluffy texture to the layers.
- 11 oz box Nilla Wafers – These classic cookies provide structure and soften into a cake-like consistency.
- 8 medium bananas, peeled and sliced – Choose ripe bananas for the best sweetness and texture.
Instructions
Step 1: Prepare the Pudding
In a medium mixing bowl, whisk together the instant vanilla pudding mix and cold milk for about 2 minutes until smooth and thick. Let it sit for 3-5 minutes to set, then gently fold in ⅓ of the Cool Whip to create a lighter, fluffier texture.
Step 2: Assemble the Layers
Start by placing a layer of Nilla Wafers at the bottom of a large trifle dish or serving bowl. Spread ¼ of the pudding mixture evenly over the wafers, then add a layer of banana slices. Repeat the layers—wafers, pudding, bananas—until all ingredients are used, finishing with a final layer of pudding.
Step 3: Top and Garnish
Spread the remaining Cool Whip evenly over the top. Crush a few Nilla Wafers and sprinkle them over the Cool Whip for added texture. Arrange a few banana slices on top for decoration.
Step 4: Chill Before Serving
Cover the dish and refrigerate for at least 2 hours, allowing the flavors to blend and the wafers to soften slightly. Serve chilled and enjoy!
FAQs
Can I make this banana pudding in advance?
Yes! In fact, it tastes even better after a few hours in the fridge. You can prepare it up to 24 hours in advance for the best results.
How do I prevent the bananas from turning brown?
To keep the banana slices fresh and prevent browning, lightly toss them in a little lemon juice before layering them into the pudding. This won’t affect the flavor but will keep them looking fresh.

 Aliquam in sagittis nulla. Curabitur euismod diam eget risus venenatis, sed dictum lectus bibendum. Nunc nunc nisi, hendrerit eget nisi id, rhoncus rutrum velit. Nunc vel mauris dolor. Class aptent taciti sociosqu ad litora torquent per conubia nostra, per inceptos himenaeos. Aliquam fringilla quis nisi eget imperdiet.


