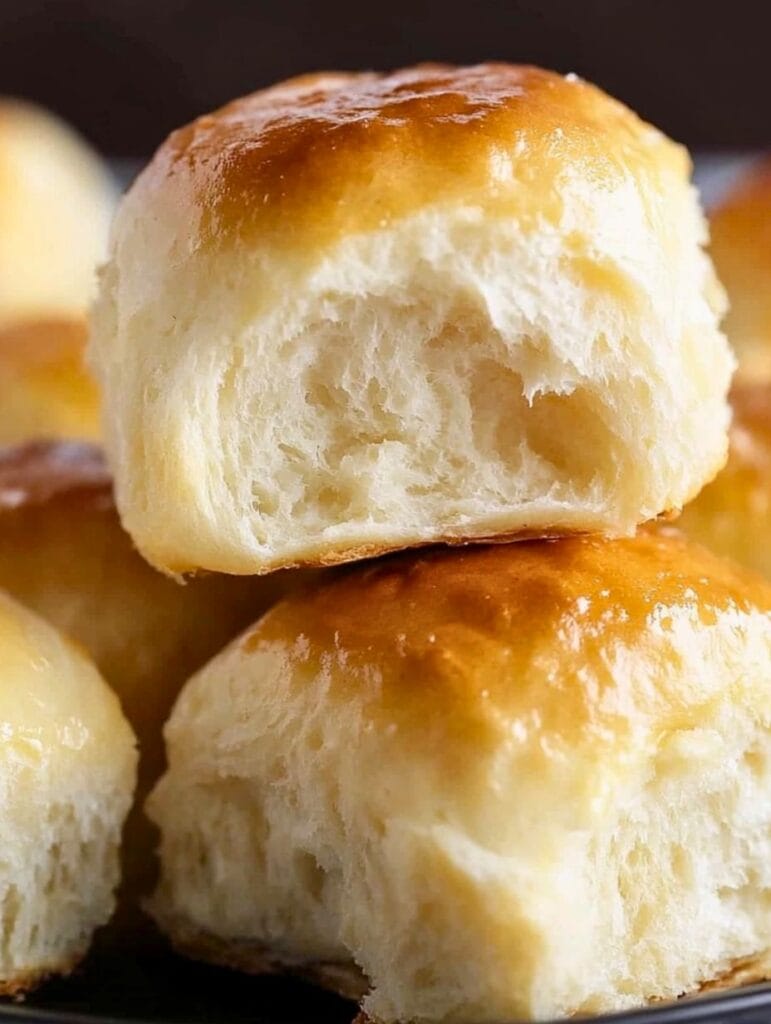
There’s nothing quite like the aroma of freshly baked homemade yeast rolls, and these easy yeast rolls are the perfect way to bring that warmth to your kitchen. Soft, fluffy, and made with simple ingredients, they’re an excellent introduction to baking with yeast.
In fact, readers tell me that these taste even better than Rhodes rolls or those nostalgic School House rolls from the cafeteria—but without any preservatives!
Whether you’re a beginner or an experienced baker, this foolproof recipe ensures delicious, golden-brown rolls every time.
Save This Recipe! 💌
Cuisine: American
Prep Time: 15 minutes
Cooking Time: 25 minutes
Resting Time: 2 hours
Total Time: 2 hour
Focus Keyword: homemade yeast rolls
Why You’ll Love Making These Yeast Rolls
- Beginner-Friendly – Simple, step-by-step instructions make this a great introduction to working with yeast.
- Soft and Fluffy Texture – These rolls turn out irresistibly light and pillowy every time.
- Make-Ahead Option – The dough can be prepared in advance and refrigerated overnight for fresh-baked rolls the next day.
- Freezer-Friendly – Bake a batch, freeze, and enjoy homemade rolls anytime.
- Perfect for Any Occasion – Whether for weeknight dinners, holiday meals, or special gatherings, these rolls are always a hit.
What You’ll Need
Having the right tools makes all the difference with homemade rolls!
- A stand mixer with dough hook — makes kneading completely hands-free and produces incredibly smooth dough. KitchenAid is the gold standard!
- A 9×13 baking dish — the perfect size for 12 pull-apart rolls
- A kitchen scale — for accurate flour measurement which is crucial in baking
- An instant read thermometer — essential for checking your milk is exactly 110°F to activate the yeast perfectly
- Unsalted butter — for the dough and for brushing on top fresh from the oven
Ingredients
- 1 cup (240mL) warm milk – Whole milk provides the best richness, but 2% milk can also be used. Ensure it’s around 110°F (43°C) to activate the yeast.
- 3 Tablespoons (38g) granulated sugar – Helps feed the yeast and adds a touch of sweetness to balance the flavor.
- 2 and ¼ teaspoons (7g) dry active yeast (or one package) – Dry active yeast needs proofing before use. Ensure it’s fresh for the best results.
- 6 Tablespoons (85g) unsalted butter, melted and cooled – Adds moisture and enhances the flavor of the rolls.
- 2 large eggs, room temperature – Contributes to the structure and soft texture of the dough. Let them sit at room temperature for about 30 minutes before using.
- 1 and ¼ teaspoon salt – Balances the sweetness and enhances the overall flavor.
- 4 and ½ cups (540g) all-purpose flour – Provides structure; measure correctly by spooning and leveling or use a scale for accuracy.
- 1 large egg – Used for the egg wash to give the rolls a golden, glossy finish.
- 1 Tablespoon water – Helps thin out the egg wash for easier application.
How To Make Them
Step 1: Proof the Yeast
In a large mixing bowl, combine the warm milk and sugar, stirring until dissolved. Sprinkle the yeast over the mixture and let it sit for about 5 minutes until foamy. If the yeast doesn’t foam, it may be inactive, and you should start over with fresh yeast.
Step 2: Mix the Dough
In a separate bowl, whisk together the melted butter, eggs, and salt. Pour this mixture into the proofed yeast mixture. Gradually add the flour, stirring with a wooden spoon or dough hook attachment on a stand mixer until a soft dough forms.
Step 3: Knead the Dough
Turn the dough onto a lightly floured surface and knead by hand for about 5 minutes until smooth and elastic. If using a stand mixer, knead on low speed for 3-4 minutes. If the dough is overly sticky, add flour 1 tablespoon at a time, but avoid adding too much to keep the rolls soft.
Step 4: First Rise
Lightly grease a large bowl and place the dough inside, turning it to coat. Cover with a clean kitchen towel or plastic wrap and let it rise in a warm, draft-free place for 60-90 minutes until doubled in size.
Step 5: Shape the Rolls
Punch down the dough to release air, then transfer it to a lightly floured surface. Shape it into a 12-inch log and cut it into 12 equal pieces. To shape each roll, flatten a piece of dough into a small square, then pull the corners into the center, pinching to seal. Roll into a smooth ball.
Step 6: Second Rise
Grease a 9″ x 13″ baking dish with nonstick spray. Arrange the dough balls in the pan, spacing them evenly. Cover and let them rise for another hour at room temperature until puffy.
Step 7: Apply Egg Wash & Bake
Preheat the oven to 375°F (190°C). In a small bowl, whisk together the egg and water, then brush the mixture over the tops of the rolls. Bake for 25-30 minutes, or until golden brown and firm to the touch. If the tops brown too quickly, tent loosely with aluminum foil.
Step 8: Cool & Serve
Remove the rolls from the oven and let them cool for 10 minutes before serving. For a softer crust, brush with melted butter while still warm. Enjoy fresh or store for later.
How to Make Overnight Rolls (Refrigerator Method)
These rolls are a lifesaver for holiday meals like Thanksgiving because you can do the hard work the day before! This method breaks up the work and actually improves the flavor.
- Refrigerator Method: Make the dough, let it do the first rise, then shape the rolls and place them in the baking pan. Cover the pan tightly with plastic wrap and place it in the fridge for up to 24 hours.
- Baking Day: Take the pan out of the fridge about 1-2 hours before dinner. Let them come to room temperature and rise on the counter until puffy, then bake as directed.
How To Make Them “Rhodes Style” Frozen Rolls
Many readers love this recipe because it tastes like a homemade version of Rhodes rolls!
- Freeze the Dough: After shaping the balls, freeze them on a baking sheet. Once solid, move them to a ziplock bag.
- To Bake: When ready to eat, place the frozen dough balls in a greased pan. Let them thaw and rise on the counter for 4-5 hours (just like the frozen store-bought kind) before baking.
Serving Suggestions
These aren’t just for dinner! Because they are so soft and sturdy, they are the perfect rolls for sandwiches or sliders.
- Holiday Leftovers: Slice them in half and fill with leftover turkey and cranberry sauce for the ultimate post-holiday snack.
- Ham & Cheese Sliders: These hold up beautifully to hot ham and cheese. Brush the tops with garlic butter and bake for a crowd-pleasing “party sandwich.”
- Breakfast: Serve them warm with honey butter, jam, or even use them for a savory bacon and egg breakfast slider.
These rolls go perfectly with my Yam Casserole for the ultimate holiday plate.
My Tips for Successful Rolls
- Baking for a Crowd: This recipe yields 12 rolls, but it doubles easily! If you are hosting a large Thanksgiving or Christmas dinner, simply double all ingredients. You can bake them in two 9×13 pans or use a large baking sheet for “pull-apart” style rolls.
- Room Temperature Eggs: Make sure your eggs are at room temperature before mixing. If they are cold from the fridge, they can cool down the warm milk and butter, which might stop the yeast from activating properly.
- Don’t Over-Flour: When kneading, only add enough flour to keep the dough from sticking to your hands. The dough should still feel slightly tacky. If you add too much flour, the rolls will be dense instead of fluffy.
More Easy Side Dish Recipes You’ll Love
Easy Air Fryer Fried Chicken (Crispy & Juicy!)
Recipe FAQs
Can I use instant yeast instead of active dry yeast?
Yes! If using instant yeast, skip the proofing step and mix it directly with the flour. The dough may also rise faster, so keep an eye on it rather than relying solely on the suggested times.
Why didn’t my dough rise?
If your dough doesn’t rise, check that your yeast is fresh and your milk was at the correct temperature (about 110°F/43°C). Also, ensure the dough is placed in a warm, draft-free area for optimal rising.
Prep time: 15 minutes Cook time: 25 minutes Rise time: 2 hours Total time: 2 hours 40 minutes Servings: 12 rolls
Whether you’re making these for Thanksgiving, Christmas, or just a Tuesday night dinner, these homemade yeast rolls will become your go-to recipe. Once you taste them fresh from the oven with a little melted butter, you’ll never go back to store-bought again!
homemade yeast rolls
Ingredients
- 1 cup warm whole milk 2% can be used
- 3 tbsp granulated sugar
- 2 1/4 tsp dry active yeast 1 packet
- 6 tbsp unsalted butter melted and cooled
- 2 large eggs room temperature
- 1 1/4 tsp salt
- 4 1/2 cup all purpose flour
- 1 large egg
- 1 tbsp water
Instructions
Step 1: Proof the Yeast
In a large mixing bowl, combine the warm milk and sugar, stirring until dissolved. Sprinkle the yeast over the mixture and let it sit for about 5 minutes until foamy. If the yeast doesn’t foam, it may be inactive, and you should start over with fresh yeast.Step 2: Mix the Dough
In a separate bowl, whisk together the melted butter, eggs, and salt. Pour this mixture into the proofed yeast mixture. Gradually add the flour, stirring with a wooden spoon or dough hook attachment on a stand mixer until a soft dough forms.Step 3: Knead the Dough
Turn the dough onto a lightly floured surface and knead by hand for about 5 minutes until smooth and elastic. If using a stand mixer, knead on low speed for 3-4 minutes. If the dough is overly sticky, add flour 1 tablespoon at a time, but avoid adding too much to keep the rolls soft.Step 4: First Rise
Lightly grease a large bowl and place the dough inside, turning it to coat. Cover with a clean kitchen towel or plastic wrap and let it rise in a warm, draft-free place for 60-90 minutes until doubled in size.Step 5: Shape the Rolls
Punch down the dough to release air, then transfer it to a lightly floured surface. Shape it into a 12-inch log and cut it into 12 equal pieces. To shape each roll, flatten a piece of dough into a small square, then pull the corners into the center, pinching to seal. Roll into a smooth ball.Step 6: Second Rise
Grease a 9″ x 13″ baking dish with nonstick spray. Arrange the dough balls in the pan, spacing them evenly. Cover and let them rise for another hour at room temperature until puffy.Step 7: Apply Egg Wash & Bake
Preheat the oven to 375°F (190°C). In a small bowl, whisk together the egg and water, then brush the mixture over the tops of the rolls. Bake for 25-30 minutes, or until golden brown and firm to the touch. If the tops brown too quickly, tent loosely with aluminum foil.Step 8: Cool & Serve
Remove the rolls from the oven and let them cool for 10 minutes before serving. For a softer crust, brush with melted butter while still warm. Enjoy fresh or store for later.
Notes