

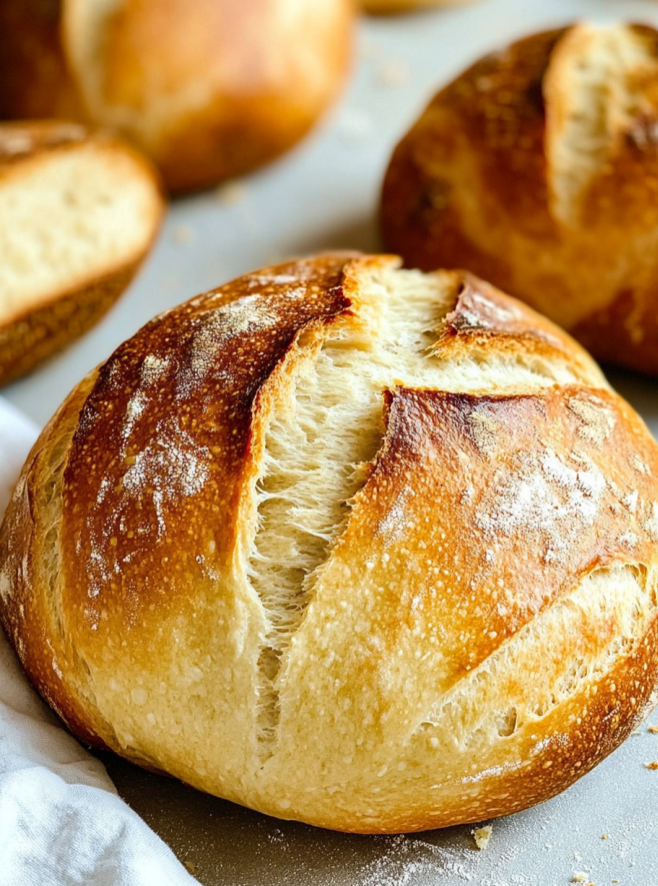
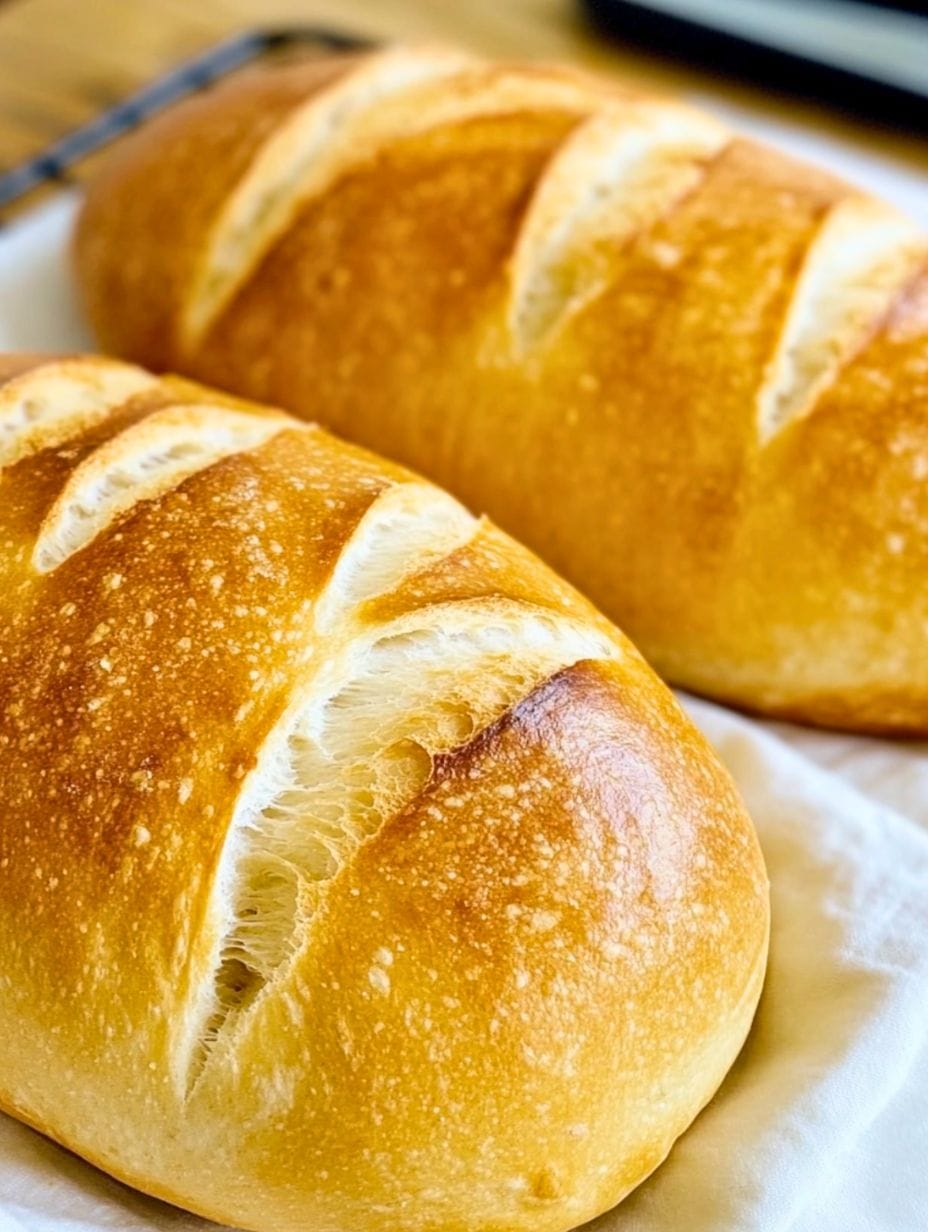
There’s an unparalleled comfort in the aroma of freshly baked bread wafting through your home. This detailed, beginner-friendly guide transforms that dream into a delicious reality. This recipe will walk you through every step to create two beautiful loaves of bread that are unbelievably soft and fluffy on the inside with a crisp, golden-brown, bakery-quality crust.
Save This Recipe! 💌
Cuisine: American
Prep Time: 2 hours
Cooking Time: 40 minutes
Total Time: 2 hours 40 minutes
Servings: 2 loaves
Here’s a great video that shows the process of making easy yeast bread.
Why You’ll Love Making It
- Truly Beginner-Friendly: This recipe is designed for a novice baker. The instructions are broken down into simple, manageable steps, ensuring a successful bake even on your first try.
- No Special Equipment Needed: You don’t need a stand mixer or any professional tools. A simple bowl and your hands are the primary tools to create an exceptional loaf.
- Irresistible Texture: Achieve the perfect textural harmony—a wonderfully soft and airy interior protected by a satisfyingly crisp and chewy crust.
- Amazingly Versatile: This bread is the perfect canvas. Enjoy a slice warm with butter, use it for hearty sandwiches, toast it for breakfast, or serve it alongside your favorite soups and salads.
- Bake Now, Enjoy Later: The recipe yields two loaves, giving you the brilliant option to enjoy one fresh out of the oven and freeze the second for a day when you need a quick, delicious bread fix.
Ingredients
- 1 tablespoon (or 1 packet) active dry yeast: This is the magic ingredient that makes the bread rise.
- 1 tablespoon granulated sugar: Acts as food for the yeast, helping it activate and create the air bubbles that give bread its light texture.
- 1 tablespoon salt: Crucial for adding flavor and for strengthening the gluten structure of the dough.
- 2 cups warm water (105-110°F / 40-43°C): The water must be warm to the touch, like a comfortable bath, to activate the yeast. If it’s too hot, it will kill the yeast; too cold, and it won’t activate properly.
- 5 ½ to 6 cups all-purpose flour: Provides the structure for the bread. Start with 5 ½ cups and add more, a little at a time, only if the dough is overly sticky.
- Cornmeal or additional flour for dusting: Prevents the loaves from sticking to the baking sheet and adds a rustic texture to the bottom crust.
- 1-2 cups of boiling water: This is for creating steam in the oven, a key secret to achieving a perfectly crisp, golden crust.
Instructions
Step 1: Activate (or “Proof”) the Yeast
In a large mixing bowl, combine the active dry yeast, sugar, salt, and warm water. Gently stir the mixture to dissolve the yeast and sugar. Let it stand for 5 to 10 minutes. During this time, the mixture should become foamy or bubbly on the surface. This “proofs” the yeast, confirming it’s alive and active. If you don’t see any foam, your yeast may be expired, and you should start over with fresh yeast to ensure your bread will rise.
Step 2: Mix the Dough
Begin adding the flour to the yeast mixture, one cup at a time, mixing well with a wooden spoon or spatula after each addition. As you add more flour, the dough will become thicker. Once it starts to pull away from the sides of the bowl and form a shaggy, sticky ball, it’s ready for the next step. Be careful not to add too much flour at once, as this can lead to a dry, dense loaf.
Step 3: Knead the Dough to Develop Gluten
Turn the dough out onto a lightly floured work surface. Kneading is a crucial step that develops gluten, giving the bread its structure and chewy texture.
Kneading Technique: To knead, fold the dough in half toward you, then use the heels of your hands to press it down and away. Give the dough a quarter turn and repeat this fold-and-press motion. Continue this process for about 5 minutes. The dough will start to become less sticky and more cohesive.
Short Rest: Let the dough rest on the counter for 2-3 minutes. This brief pause allows the gluten to relax, making the final kneading easier.
Final Knead: Knead for another 2 minutes until the dough is smooth and elastic. To check if it’s ready, perform the “windowpane test”: tear off a small piece of dough and gently stretch it between your fingers. If you can stretch it thin enough to see light through it without it tearing, the gluten is perfectly developed.
Step 4: The First Rise (Bulk Fermentation)
Lightly grease a clean, large bowl with olive oil or non-stick spray. Place the kneaded dough in the bowl and turn it over once to coat the top with a thin layer of oil. This prevents a dry skin from forming. Cover the bowl with a damp cloth or plastic wrap and place it in a warm, draft-free spot.
Ideal Rising Environment: A slightly warm place is ideal. You can place the bowl in an oven that is turned off with only the light on.
Check for Doubling: Let the dough rise for 1 to 2 hours, or until it has doubled in size. To check if it’s ready, gently poke the dough with a floured finger. If the indentation remains, it’s ready for the next step.
Step 5: Shape the Loaves
Gently punch down the center of the risen dough to release the built-up gas. Turn it out onto a lightly floured surface and knead briefly for about 30 seconds to smooth it out. Divide the dough into two equal portions.
Shaping Technique: Take one portion and gently flatten it into a rough rectangle. Fold the bottom third up to the middle and press down. Fold the top third down over the first fold, like a letter. Then, starting from the long side, roll the dough up tightly into a log. Pinch the seam at the bottom to seal it. Tuck the ends under slightly to create a neat, oval-shaped loaf. Repeat with the second piece of dough.
Prepare Baking Sheet: Generously sprinkle a baking sheet with cornmeal. Place the shaped loaves on the sheet, leaving several inches between them.
Step 6: Prepare the Oven for a Crispy Crust
Using a very sharp knife or a bread lame, make three or four quick, ¼-inch deep diagonal slashes across the top of each loaf. This allows the bread to expand properly in the oven, a process known as “oven spring.” Lightly brush the tops of the loaves with cold water. Place an aluminum or cast iron pan on the bottom rack of your oven. Carefully fill it with about an inch of boiling water. This will create a steamy environment that is essential for a crisp, golden-brown crust.
Step 7: Bake to Perfection
Place the baking sheet with the loaves on the middle rack of a cold oven. Do not preheat it. Starting in a cold oven allows for a more gradual and even rise. Set the oven temperature to 400°F (204°C) and bake for 35 to 45 minutes. The bread is done when the crust is a deep golden brown and it sounds hollow when you tap the bottom. For a precise check, the internal temperature should be between 190°F and 200°F.
Step 8: Cool Completely
Transfer the baked loaves to a wire rack to cool completely. As tempting as it is, avoid slicing into the bread while it’s still warm. The internal structure is still setting, and cutting it too early can result in a gummy texture.
Tips for Success
Measure Flour Correctly: Spoon the flour into your measuring cup and level it off. Scooping directly from the bag can pack the flour and result in using too much.
Don’t Rush the Rise: Be patient and let the dough double in size during the first rise. This is where the flavor develops.
Steam is Key: Don’t skip the step with the pan of boiling water. Steam keeps the crust moist at the beginning of baking, allowing the bread to fully expand before the crust sets.
Know Your Oven: Ovens can vary. If you notice the top browning too quickly, you can loosely tent it with aluminum foil for the last 10 minutes of baking.
FAQs
Can I use instant yeast instead of active dry yeast?
Yes. If using instant yeast, you can skip the activation step and mix it directly with the dry ingredients. Your rise time might be slightly shorter.
What should I do if my dough doesn’t rise?
This is usually due to one of three things: the yeast was expired, the water was too hot and killed the yeast, or the room is too cold. Ensure your yeast is fresh and your water is at the correct temperature. If your kitchen is cold, find a warmer spot like a turned-off oven with the light on.
How do I store homemade bread?
Once completely cooled, store the bread in a paper bag or a bread box at room temperature for up to 3 days. Avoid plastic bags, which can trap moisture and make the crust soft. For longer storage, wrap the loaf tightly in plastic wrap and then foil, and freeze for up to 3 months. To reheat, let it thaw at room temperature and then warm it in a 350°F oven for 5-10 minutes.
Easy Yeast Bread
Ingredients
- 1 tbsp Active Dry Yeast
- 1 tbsp Granulated Sugar
- 1 tbsp Salt
- 2 cups Warm Water
- 5 ½ to 6 cups All-Purpose Flour
- Cornmeal or Additional Flour (for dusting)
- 1-2 cups Boiling Water
Instructions
- In a large mixing bowl, combine the active dry yeast, sugar, salt, and warm water. Gently stir the mixture to dissolve the yeast and sugar. Let it stand for 5 to 10 minutes. During this time, the mixture should become foamy or bubbly on the surface. This "proofs" the yeast, confirming it's alive and active. If you don't see any foam, your yeast may be expired, and you should start over with fresh yeast to ensure your bread will rise.
- Begin adding the flour to the yeast mixture, one cup at a time, mixing well with a wooden spoon or spatula after each addition. As you add more flour, the dough will become thicker. Once it starts to pull away from the sides of the bowl and form a shaggy, sticky ball, it's ready for the next step. Be careful not to add too much flour at once, as this can lead to a dry, dense loaf.
- Turn the dough out onto a lightly floured work surface. Kneading is a crucial step that develops gluten, giving the bread its structure and chewy texture.Kneading Technique: To knead, fold the dough in half toward you, then use the heels of your hands to press it down and away. Give the dough a quarter turn and repeat this fold-and-press motion. Continue this process for about 5 minutes. The dough will start to become less sticky and more cohesive.Short Rest: Let the dough rest on the counter for 2-3 minutes. This brief pause allows the gluten to relax, making the final kneading easier.Final Knead: Knead for another 2 minutes until the dough is smooth and elastic. To check if it's ready, perform the "windowpane test": tear off a small piece of dough and gently stretch it between your fingers. If you can stretch it thin enough to see light through it without it tearing, the gluten is perfectly developed.
- Lightly grease a clean, large bowl with olive oil or non-stick spray. Place the kneaded dough in the bowl and turn it over once to coat the top with a thin layer of oil. This prevents a dry skin from forming. Cover the bowl with a damp cloth or plastic wrap and place it in a warm, draft-free spot.Ideal Rising Environment: A slightly warm place is ideal. You can place the bowl in an oven that is turned off with only the light on.Check for Doubling: Let the dough rise for 1 to 2 hours, or until it has doubled in size. To check if it's ready, gently poke the dough with a floured finger. If the indentation remains, it's ready for the next step.
- Gently punch down the center of the risen dough to release the built-up gas. Turn it out onto a lightly floured surface and knead briefly for about 30 seconds to smooth it out. Divide the dough into two equal portions.Shaping Technique: Take one portion and gently flatten it into a rough rectangle. Fold the bottom third up to the middle and press down. Fold the top third down over the first fold, like a letter. Then, starting from the long side, roll the dough up tightly into a log. Pinch the seam at the bottom to seal it. Tuck the ends under slightly to create a neat, oval-shaped loaf. Repeat with the second piece of dough.Prepare Baking Sheet: Generously sprinkle a baking sheet with cornmeal. Place the shaped loaves on the sheet, leaving several inches between them.
- Using a very sharp knife or a bread lame, make three or four quick, ¼-inch deep diagonal slashes across the top of each loaf. This allows the bread to expand properly in the oven, a process known as "oven spring." Lightly brush the tops of the loaves with cold water. Place an aluminum or cast iron pan on the bottom rack of your oven. Carefully fill it with about an inch of boiling water. This will create a steamy environment that is essential for a crisp, golden-brown crust.
- Place the baking sheet with the loaves on the middle rack of a cold oven. Do not preheat it. Starting in a cold oven allows for a more gradual and even rise. Set the oven temperature to 400°F (204°C) and bake for 35 to 45 minutes. The bread is done when the crust is a deep golden brown and it sounds hollow when you tap the bottom. For a precise check, the internal temperature should be between 190°F and 200°F.
- Transfer the baked loaves to a wire rack to cool completely. As tempting as it is, avoid slicing into the bread while it's still warm. The internal structure is still setting, and cutting it too early can result in a gummy texture.


hey Sandra Clare, can I use wheat flour instead of white for this bread recipe? Not sure how it changes the texture or taste.
first time trying to bake bread for bbq, this looks doable. fingers crossed
Actually think active dry yeast gives a richer flavor than instant. Anyone else found that too?
Absolutely, ChefCurious! Active yeast does enhance flavor due to its fermentation process.
wonder if i can add chocolate chips to this bread, make it a dessert lol
Love this! Simple enough for a college guy like me. Making it this weekend!
Looks easy. But who has the time to wait for bread to rise these days, right?
Oh sure, because everyone just happens to have yeast lying around. Next, you’ll tell me they have flour too.
Yeah, because nothing says ‘fun’ like waiting 4 hours for bread to rise.
Active dry yeast and instant yeast aren’t the same. Flavor and rise times differ.
I love the detailed steps! Just what a newbie like me needs. Can’t wait to try it out.
Tried it. Bread’s dry. Wouldn’t recommend.
Excellent step-by-step guide. Good for beginners.
hey, can u freeze this type of bread? need to know, thx.
Imagine adding kimchi to the dough. Crazy or genius?
this is a great recipe but how long do you knead for? my arms got tired lol
dude, this bread recipe is the bomb. Made it, loved it.
Can I add glitter to make it sparkle? Asking for a friend haha.
Great, as if I needed another reason to carb load. Thanks, Sandra.
Baking bread is too much work. Raw is better.
For those asking, replacing with gluten-free flour requires xanthan gum for texture. FYI.
wowzer, tried this and it’s amazing. Fresh bread is the best!
Too many steps. Not for me.
Active dry and instant yeasts are interchangeable in recipes, but hydration methods differ.
this bread need a special pan to bake in?
Too long to make. Not waiting 3 hours for bread.
Gonna try adding herbs to this. Fresh rosemary bread, here I come!