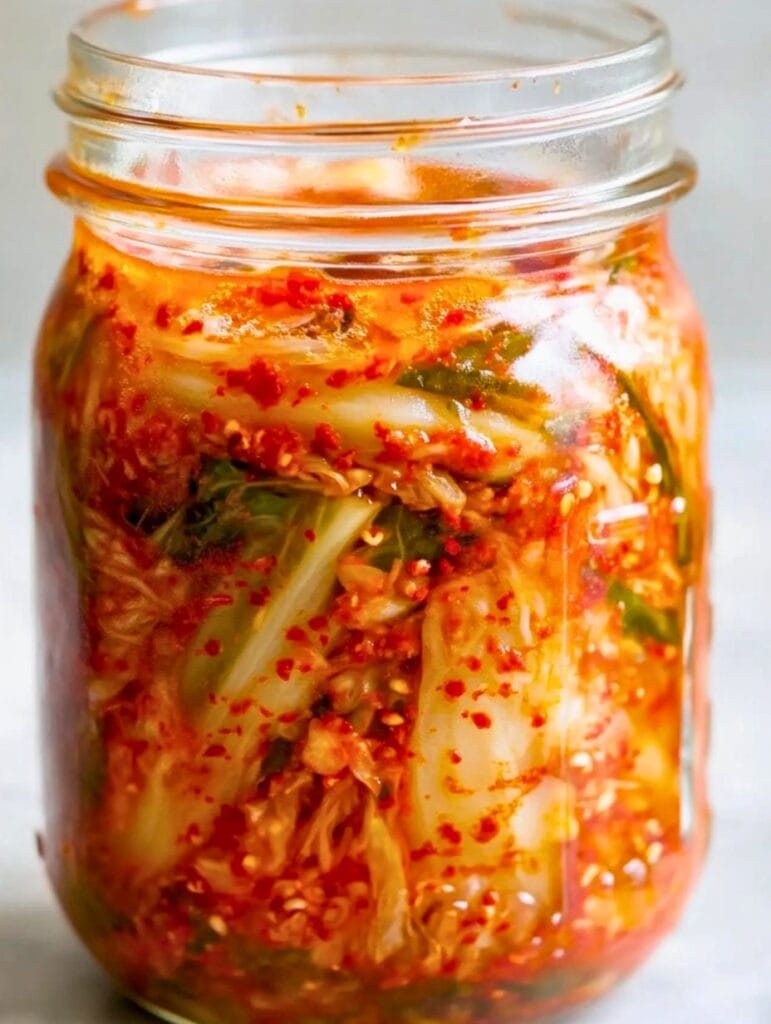
Kimchi is more than just a side dish; it’s the vibrant, spicy, and tangy soul of Korean cuisine. If you’ve ever been intimidated by the thought of making it at home, this is the recipe for you. We’ve broken down the traditional process into simple, manageable steps that guarantee authentic, delicious results.

Cuisine: Korean
Prep Time: 45 minutes
Fermentation Time: 1 to 5 days
Total Time: 1 to 5 days
Servings: 8
Here’s a great video that shows the process of making homemade kimchi.
Why You’ll Love Making It
- Totally Beginner-Friendly: This recipe demystifies the fermentation process. No special equipment is needed, just a large bowl and a glass jar.
- Authentic, Bold Flavor: We use traditional ingredients like gochugaru and fish sauce to build that complex, umami-rich, and spicy flavor that makes kimchi so addictive.
- Perfectly Customizable: You control the spice! We’ll guide you on how to make your kimchi perfectly mild or intensely fiery to suit your taste.
- Packed with Probiotics: Homemade kimchi is a powerhouse of healthy, gut-friendly bacteria that can boost your immune system and aid digestion.
- Incredibly Versatile: Enjoy it as a side dish (banchan) with any meal, or use it to transform fried rice, stews, pancakes, and even grilled cheese sandwiches.
Ingredients
- 1 medium head napa cabbage (about 2 pounds): This is the classic choice for kimchi. Its tender leaves and crisp ribs absorb the seasoning beautifully.
- 1/4 cup iodine-free sea salt or kosher salt: Crucial! Use coarse salt without iodine or anti-caking agents, as these can inhibit the fermentation process.
- Water (distilled or filtered): Tap water often contains chlorine, which can harm the good bacteria needed for fermentation. Using filtered or distilled water is a safer bet.
- 1 tablespoon grated garlic (about 5-6 large cloves): Adds a pungent, sharp bite that mellows as it ferments.
- 1 teaspoon grated fresh ginger: Provides a warm, zesty counterpoint to the garlic and chili.
- 1 teaspoon granulated sugar: A little sugar gives the fermenting bacteria a “snack” to kickstart the process.
- 2 tablespoons fish sauce or salted shrimp paste (saeujeot): This is the secret to deep, savory umami flavor. For a vegan alternative, use 3 tablespoons of soy sauce or a tablespoon of miso paste mixed with 2 tablespoons of water.
- 1 to 5 tablespoons Korean red pepper flakes (gochugaru): This is non-negotiable for authentic flavor. Gochugaru has a unique fruity, smoky heat and vibrant red color. Do not substitute with cayenne or standard chili powder. Use 1 tbsp for mild, 3 tbsp for medium, and 5+ tbsp for spicy.
- 8 ounces Korean radish or daikon radish, peeled and cut into thin 2-inch matchsticks: Adds a refreshing crunch and a slightly peppery flavor.
- 4 medium scallions, cut into 1-inch pieces: Lends a fresh, mild oniony flavor that complements the other ingredients.
Instructions
Step 1: Prepare and Salt the Cabbage
- Cut the Cabbage: Slice the napa cabbage in half lengthwise, then slice each half in half again to create four long quarters. Cut out the dense, hard core from the bottom of each quarter.
- Chop: Lay each quarter flat and slice it crosswise into 2-inch-wide strips.
- Salt and Massage: Place the chopped cabbage in a very large bowl. Sprinkle the salt over it. Put on a pair of food-safe gloves and begin massaging the salt into the cabbage for 2-3 minutes. The cabbage will start to soften and release water.
- Brine: Pour enough filtered or distilled water over the cabbage to cover it completely. Place a plate or another heavy object on top to keep the cabbage submerged. Let it sit at room temperature for 1 to 2 hours.
- Tip: The cabbage is ready when you can take one of the thicker white pieces and bend it to a 90-degree angle without it snapping. If it still snaps, let it brine for another 30 minutes.
Step 2: Rinse and Drain
- Pour the cabbage into a colander in the sink and drain away all the salty water.
- Rinse the cabbage thoroughly under cold running water, tossing it with your hands to make sure all the pieces get rinsed. Do this three separate times.
- After the final rinse, shake the colander to remove as much water as possible. Let the cabbage sit and drain for at least 20-30 minutes while you prepare the paste.
Step 3: Make the Kimchi Paste
- While the cabbage drains, grab a medium bowl. Combine the grated garlic, grated ginger, sugar, and fish sauce (or your chosen vegan alternative). Mix until well combined.
- Stir in the gochugaru (Korean red pepper flakes). Start with the lower amount for mild kimchi and add more to your desired heat level. The mixture should form a thick, fragrant red paste.
- Add the julienned radish and chopped scallions to the paste and stir to coat them.
Step 4: Combine Everything
- Gently squeeze small handfuls of the drained cabbage to remove any remaining water, then add it to the bowl with the kimchi paste and other vegetables.
- Using your gloved hands, mix everything together thoroughly. Ensure every piece of cabbage and radish is evenly coated in the beautiful red paste. Don’t be shy—get in there and mix well!
Step 5: Pack the Jar
- Tightly pack the kimchi mixture into a clean 2-quart (half-gallon) glass jar. Press down firmly on the kimchi with your fist or a spoon as you go. This helps remove air pockets and encourages the brine to rise.
- Leave at least 1-2 inches of headspace at the top of the jar. The kimchi will expand and produce more brine as it ferments, so this space is essential to prevent overflow.
- Wipe the inside rim of the jar clean. Loosely cover the jar with its lid. You don’t want to seal it airtight, as fermentation creates gases that need to escape.
Step 6: Ferment at Room Temperature
- Place the jar on a plate or in a shallow bowl to catch any brine that might bubble over.
- Let the jar sit at a cool, dark room temperature (around 65-70°F or 18-21°C) for 1 to 5 days. Keep it out of direct sunlight.
- Check it daily! At least once a day, open the lid to “burp” the jar and release the built-up gases. Use a clean spoon to press the kimchi down, ensuring it stays submerged under the brine. You should start to see bubbles and notice a tangy, sour smell developing—these are great signs!
- Start tasting it after day 2. When it has reached a level of sourness and tang that you enjoy, it’s ready.
Step 7: Refrigerate and Enjoy
Cold temperatures will dramatically slow down the fermentation process. Your kimchi is ready to eat right away, but the flavor will continue to develop and deepen over the next week or two.
Once your kimchi is fermented to your liking, tighten the lid and move the jar to the refrigerator.
FAQs
How long will my homemade kimchi last?
Stored properly in the fridge, your kimchi will last for at least 3-6 months. Its flavor will continue to change, becoming more sour and intense over time. This more “aged” kimchi is perfect for cooking dishes like kimchi-jjigae (stew) or kimchi fried rice.
I see a white film on top of my kimchi. Is it mold?
It’s likely Kahm yeast, which is harmless but can impart a strange flavor. It looks like a thin, cloudy white film. You can skim it off the top and ensure the rest of the kimchi is submerged in brine. True mold is fuzzy and colored (blue, green, black) and means you should discard the batch.
Why isn’t my kimchi bubbling?
Fermentation can be affected by temperature. If your room is too cold, it will be slow to start. Give it another day or two in a slightly warmer spot. Also, ensure you used chlorine-free water and iodine-free salt.
Can I use a different kind of salt?
It’s highly recommended to use kosher or sea salt without iodine. Standard table salt contains iodine and anti-caking agents that can interfere with the healthy bacteria and give your kimchi a cloudy brine and a bitter taste.
What are the best jars to use for kimchi?
A large glass jar (like a half-gallon mason jar) is perfect. You can also use a traditional Korean earthenware pot (onggi) or a modern fermentation crock with an airlock, which automatically releases gas for you. Avoid metal containers, as they can react with the acids in the kimchi.

 Aliquam in sagittis nulla. Curabitur euismod diam eget risus venenatis, sed dictum lectus bibendum. Nunc nunc nisi, hendrerit eget nisi id, rhoncus rutrum velit. Nunc vel mauris dolor. Class aptent taciti sociosqu ad litora torquent per conubia nostra, per inceptos himenaeos. Aliquam fringilla quis nisi eget imperdiet.


Can I use regular table salt for salting the cabbage or does it gotta be something special?
Sandra Clare, this kimchi guide is a godsend! Been looking for a go-to recipe. Can’t wait to put my own twist on it!
homemade kimchi? sounds like a food poisoning waiting to happen…
I love how comprehensive this is! Authentic kimchi takes patience but it’s so worth it.
i’m a bit nervous about the fermenting part how do i know if i did it right?
It’s easy! Look for small bubbles and a tangy smell. You’re gonna do great!
Guess I’m turning myself into a pickle with all this fermenting haha
Fermented foods are a staple for gut health! Excited to try making my own kimchi following your steps.
So if my kimchi starts moving, that’s normal, right? Asking for a friend.
I appreciate the step-by-step detail in this recipe. I’ll be sharing my experience and adaptation on my blog!
Your instructions are super clear, can’t wait to photograph my own batch of kimchi!
how long can i keep the kimchi in the fridge before it goes bad?
Just made this kimchi and it’s a hit at home! Added a tiny bit of sugar for my sweet tooth 🙂
wow never knew making kimchi was this easy, gotta crank up the spice even more next time!
A stellar guide for beginners and experts alike. Fermentation is an art and science.
Adding this to my list of vegetarian recipes, thanks Sandra Clare for the inspiration!
Never thought making kimchi would be something I’d try, but here we are! So excited!
Hope my kimchi turns out scary good or it’s gonna haunt me!
I found the fermentation process fascinating. It’s my first time, and I’m curious how the flavors will develop.
Does anyone know if there’s a tech gadget to help with the fermentation process? Like some smart jar?
Making kimchi is my next adventure, can’t wait to taste it!
Homemade kimchi is an excellent probiotic source, beneficial for digestive health. Glad to see this tutorial.
I’ll stick to store-bought, thanks but no thanks.
Kimchi is such a rewarding ferment. Each batch is unique, and watching it transform is part of the joy.
What if the kimchi starts talking to me after it ferments? Lol
This article was informative. I am considering trying this at home.
So excited to try this out! If it goes well, it’s kimchi for everyone this Christmas!