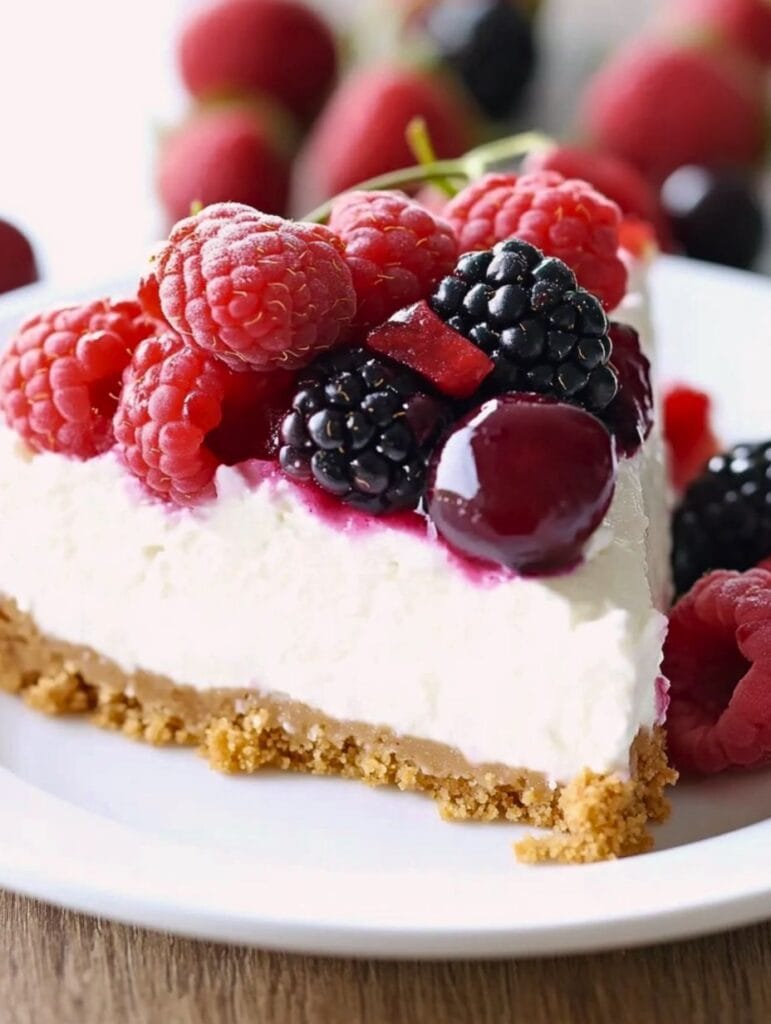
If you’re looking for a dessert that is both indulgent and effortless, this no-bake cheesecake is the perfect choice. Unlike traditional baked cheesecakes that require precise oven temperatures and long baking times, this version sets in the fridge, making it foolproof even for beginners.

Cuisine: American
Prep Time: 15 minutes
Chilling Time: 6 hours
Total Time: 6 hours 15 minutes
Servings: 8 to 12
Why You’ll Love Making It
- No Oven Needed – A perfect dessert for warm weather or when you don’t want to turn on the oven.
- Foolproof & Beginner-Friendly – Simple steps with no risk of cracking or overbaking.
- Light, Creamy & Luscious – The whipped cream makes this cheesecake airy, yet rich and indulgent.
- Make-Ahead Friendly – Chilling overnight enhances the texture and flavor, making it a great prep-ahead dessert.
- Customizable – Top it with fresh fruit, caramel drizzle, or even crushed chocolate cookies for your own unique twist.
Ingredients
- 8 ¾ ounces graham cracker or Biscoff crumbs (about 2 cups; 250g) – Finely crushed for a solid, buttery base.
- 2 ½ ounces unsalted butter, melted (about 5 tablespoons; 70g) – Binds the crumbs together and adds richness.
- Pinch of kosher salt – Enhances the flavor of the crust without making it salty.
- 16 ounces full-fat cream cheese (two 8-ounce packages; 455g) – Use room-temperature cream cheese for a smooth and creamy texture. Philadelphia brand works best.
- 5 ¼ ounces granulated sugar (about ¾ cup; 150g) – Sweetens the filling without overpowering it.
- ¾ ounce fresh lemon juice (about 4 ½ teaspoons; 20g) – Adds a slight tang that balances the richness.
- ¼ teaspoon vanilla extract – Enhances the flavor with warm, aromatic notes.
- ⅛ teaspoon kosher salt – If using table salt, reduce the amount by half.
- 12 ounces heavy cream (about 1 ½ cups; 340g) – Whipped to stiff peaks to make the filling light and airy.
- 12 ounces fresh fruit (about 2 cups; 340g) – Washed and dried. Strawberries, raspberries, or blueberries add color and freshness.
Instructions
Step 1: Prepare the Crust
Crush the graham crackers or Biscoff cookies into fine crumbs using a food processor. Alternatively, place them in a sealed zip-top bag and crush them with a rolling pin until finely ground. In a small bowl, mix the crumbs with melted butter and a pinch of salt, stirring until the mixture resembles damp sand. Pour the crumb mixture into a 9-inch tart pan or pie plate, and using the bottom of a measuring cup or glass, press the crumbs into an even layer across the bottom and slightly up the sides. Refrigerate the crust while you prepare the filling to help it firm up.
Step 2: Make the Filling
In the bowl of a stand mixer fitted with a paddle attachment, combine the softened cream cheese and sugar. Mix on low speed until the sugar is fully incorporated, then increase to medium speed and beat until smooth and creamy, about two minutes. Add the lemon juice, vanilla extract, and salt, mixing until just combined. Scrape down the sides of the bowl with a spatula to ensure everything is evenly incorporated. Switch to the whisk attachment and pour in the heavy cream. Start mixing on low speed, gradually increasing to high, and whip until the mixture thickens and forms stiff peaks, about three to five minutes.
Step 3: Assemble & Chill
Transfer the cheesecake filling into the prepared crust and use a spatula or the back of a spoon to spread it evenly, creating decorative swirls if desired. Cover the cheesecake with plastic wrap and refrigerate for at least six hours, or until the filling is fully set. For the best texture, allow it to chill overnight.
Step 4: Serve & Enjoy
Before serving, top the cheesecake with fresh fruit such as strawberries, raspberries, or blueberries for a pop of color and added freshness. To get clean slices, dip a sharp knife in hot water, wipe it dry, and slice, repeating the process between cuts. Serve chilled and enjoy! Store any leftovers covered in the refrigerator for up to four days.
FAQs
Can I make this cheesecake ahead of time?
Yes! This cheesecake actually tastes even better when made a day in advance. Store it covered in the refrigerator for up to four days.
Can I freeze this no-bake cheesecake?
Yes! Wrap the cheesecake tightly in plastic wrap and freeze for up to two months. Thaw in the refrigerator overnight before serving.

 Aliquam in sagittis nulla. Curabitur euismod diam eget risus venenatis, sed dictum lectus bibendum. Nunc nunc nisi, hendrerit eget nisi id, rhoncus rutrum velit. Nunc vel mauris dolor. Class aptent taciti sociosqu ad litora torquent per conubia nostra, per inceptos himenaeos. Aliquam fringilla quis nisi eget imperdiet.


