Skip the oven and try this rich and creamy no-bake cheesecake. Ideal for hot days when you want a decadent dessert without turning up the heat, this cheesecake is a summer must-have.
Save This Recipe! 💌
- Cuisine: American
- Prep Time: 30 minutes
- Cook Time: N/A
- Total Time: 4 hours 30 minutes (includes chilling)
- Servings: 8
Why You’ll Love This Recipe
- No oven required—perfect for keeping cool in the summer.
- Rich, creamy texture that rivals a baked cheesecake.
- Easy to customize with your favorite fruit toppings.
- Can be made ahead for party convenience.
Ingredients
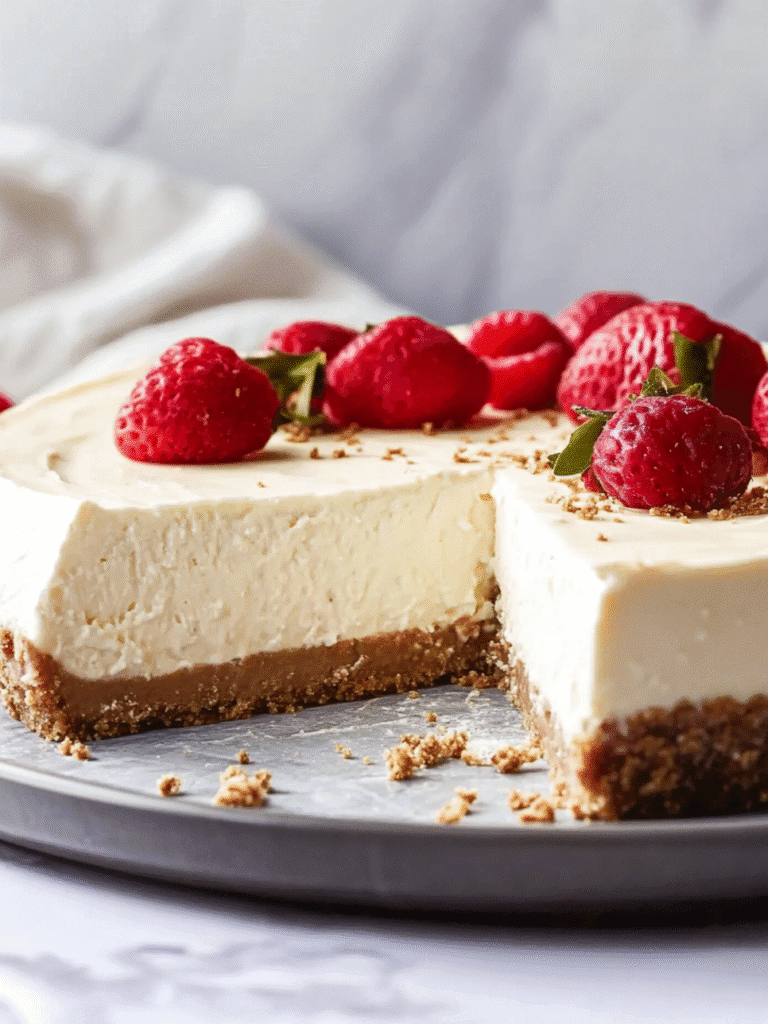
- 1 ½ cups graham cracker crumbs: Forms the base of the cheesecake, providing a classic sweet and slightly crunchy crust.
- ⅓ cup packed brown sugar: Adds caramel-like depth to the crust.
- ½ teaspoon ground cinnamon: Adds warmth and a hint of spice to the crust.
- ⅓ cup butter, melted: Binds the crust ingredients together for stability.
- 2 (8 ounce) packages cream cheese: The main component of the filling, providing creamy richness.
- 2 teaspoons lemon juice: Balances the creaminess with a touch of acid for brightness.
- 1 pint heavy whipping cream: Whipped to add airy lightness to the filling.
- ⅓ cup white sugar: Sweetens the filling and complements the tanginess of the cream cheese.
- 1 (21 ounce) can cherry pie filling or fresh berries: Toppings for a burst of fruity flavor and vibrant color.
How to Make It
Step 1: Prepare the Crust
Combine graham cracker crumbs, brown sugar, cinnamon, and melted butter in a bowl. Mix until the crumbs are evenly coated and the texture resembles wet sand. Press the mixture firmly and evenly across the bottom of a 9-inch springform pan. Chill the crust in the refrigerator for at least 15 minutes to set.
Step 2: Beat the Cream Cheese
In a large mixing bowl, beat the cream cheese with lemon juice until smooth and creamy. This step ensures a velvety texture without lumps. Gradually add the white sugar, continuing to beat until the mixture is well combined and there is no graininess.
Step 3: Whip the Cream
In a separate bowl, whip the heavy whipping cream until stiff peaks form. This ensures that the filling will hold its shape and have a light, airy texture. Gently fold the whipped cream into the cream cheese mixture, being careful not to deflate the fluffiness.
Step 4: Assemble and Chill
Pour the creamy mixture over the prepared crust, spreading evenly. Cover and refrigerate for at least 4 hours, or until firmly set. The chilling time allows the filling to solidify into a sliceable cheesecake.
Step 5: Add the Topping
Before serving, spread your preferred cherry pie filling or arrange fresh berries over the cheesecake to enhance its flavor and presentation. For best results, choose fresh fruits that add color and complement the creamy filling.
Recipe FAQs
Can I use a different type of pie filling?
Absolutely! Feel free to experiment with different fruit pie fillings like blueberry or strawberry, or use a combination of fresh fruits for a personalized touch.
How do I know when the cheesecake is set?
The cheesecake should be firm throughout and hold its shape when sliced. Chilling for at least 4 hours, or overnight for best results, will ensure the ideal texture.
Can I make this cheesecake ahead?
Yes, this cheesecake can be made a day in advance. Store it in the refrigerator, covered, to keep it fresh until you’re ready to serve.