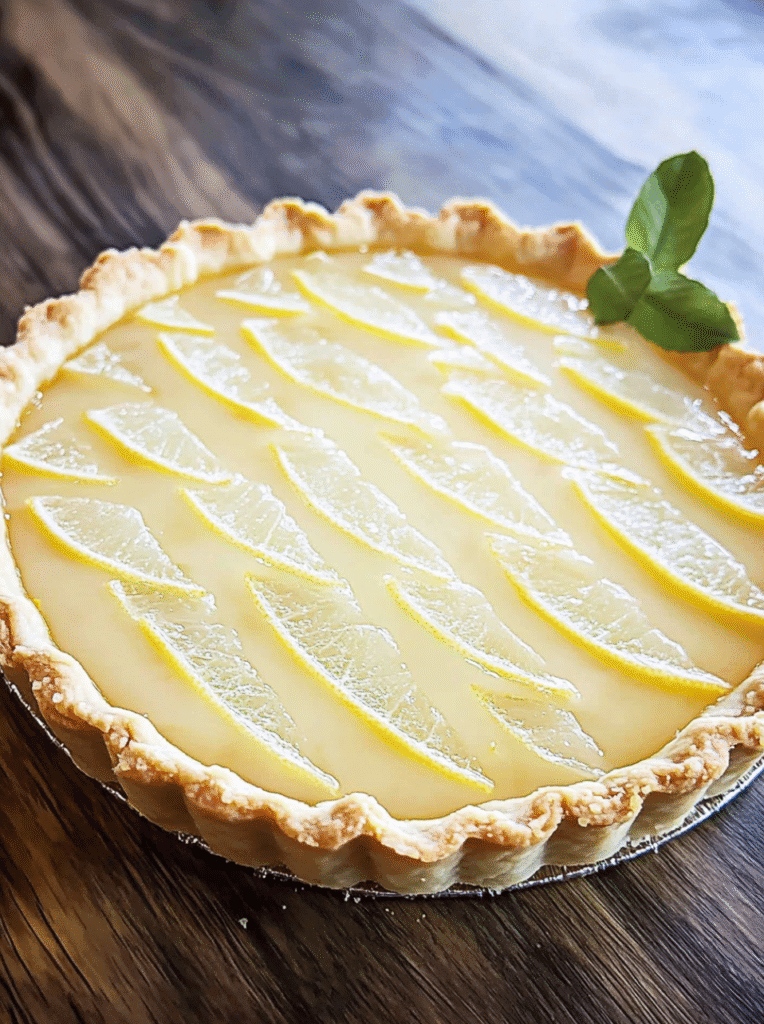
This lemon tart is your go-to for a refreshing, zesty dessert that balances tart and sweet effortlessly. With no need for fancy equipment or hard-to-find ingredients, it’s an elegantly simple solution to end any meal on a high note.
Save This Recipe! 💌
- Cuisine: French
- Prep Time: 20 minutes
- Cook Time: 40 minutes
- Total Time: 1 hour
- Servings: 8
What Is a Lemon Tart?
This easy lemon tart recipe is a classic French-inspired dessert that strikes the perfect balance between tangy and sweet — a buttery melt-in-your-mouth shortbread crust filled with a silky smooth lemon filling that’s bright, citrusy, and absolutely irresistible. The best part? Despite looking incredibly elegant and impressive, this lemon tart is surprisingly simple to make with just pantry staples and one hour of your time. It’s the dessert that makes everyone think you went to baking school!
Why You’ll Love This Lemon Tart Recipe
- Elegant and impressive — looks like a professional bakery tart
- Ready in 1 hour — surprisingly simple for such a stunning result
- Perfect balance — not too tart, not too sweet — absolutely perfect!
- Simple pantry ingredients — butter, eggs, lemons, flour, sugar
- No fancy equipment — just a tart pan and a bowl
- Perfect for any occasion — dinner parties, holidays, or just because!
What You’ll Need
- A 9-inch tart pan with removable bottom — the removable bottom makes serving so much easier!
- A microplane or lemon zester — for getting maximum flavor from the lemon zest
- Fresh lemons — you’ll need about 3-4 lemons for ½ cup juice plus zest
- Room temperature butter — essential for a smooth creamy crust dough
- A fine mesh strainer — optional but straining the filling removes any lumps for a perfectly silky texture
The Secret to a Perfect Lemon Tart
Two things make the difference between a good lemon tart and a perfect one:
Pre-bake the crust! Baking the crust before adding the filling prevents the dreaded soggy bottom. You want a golden crisp crust that can hold the silky filling without absorbing it!
Don’t overbake the filling! The filling is perfectly done when it has just a slight jiggle in the center — like a cheesecake. It will continue to firm up as it cools. Overbaking creates a grainy texture and cracks in the surface!
Tips for the Best Lemon Tart
- Use room temperature butter — cold butter won’t cream properly and creates a crumbly uneven crust
- Press crust evenly — take your time pressing the crust into the pan to ensure even thickness so it bakes uniformly
- Fresh lemon juice only — this is non-negotiable! Bottled lemon juice tastes flat and significantly affects the final flavor
- Zest before juicing — it’s much easier to zest a whole lemon than a squeezed one!
- Don’t skip the pre-bake — golden pre-baked crust = no soggy bottom
- Strain the filling — pour through a fine mesh strainer before baking for the silkiest most professional result
- Cool completely — patience! A warm tart will run when sliced. Let it cool fully before serving!
- Dust with sugar right before serving — confectioners’ sugar dissolves quickly so add it just before serving!
Variations
- Lemon curd tart — use a classic lemon curd filling for a richer more traditional French version
- Lime tart — substitute lime juice and zest for a tropical twist
- Lemon berry tart — top the finished tart with fresh raspberries or blueberries for stunning color and flavor
- Meyer lemon tart — Meyer lemons are sweeter and less acidic — beautiful in spring!
- Mini lemon tarts — use mini tart pans for elegant individual servings perfect for parties
- Add meringue — top with Italian meringue and torch for a lemon meringue tart!
What to Serve with Lemon Tart
- Freshly whipped cream — a classic pairing
- A scoop of vanilla ice cream
- Fresh berries — raspberries and blueberries are stunning alongside lemon
- Mint leaves for garnish
- A cup of Earl Grey tea — the bergamot pairs beautifully with lemon!
How to Store Lemon Tart
Refrigerator: Store covered in the refrigerator for up to 3 days. The crust may soften slightly over time but the flavor remains incredible!
Freezing: Freeze the tart without the confectioners’ sugar for up to 1 month. Wrap tightly in plastic wrap then foil. Thaw overnight in the refrigerator.
Room temperature: The tart can sit at room temperature for up to 2 hours for serving — perfect for dinner parties!
Frequently Asked Questions
Can I use bottled lemon juice instead of fresh? Freshly squeezed lemon juice is strongly recommended. Bottled juice tastes flat and less vibrant which significantly affects the tart’s overall flavor. Use about 3-4 fresh lemons!
How do I know when the filling is set? The filling is done when it holds with just a slight jiggle in the very center — similar to a cheesecake. It firms up considerably as it cools so don’t overbake!
Can I make this ahead of time? Yes! The tart can be made up to 2 days ahead and refrigerated. Add the confectioners’ sugar dusting just before serving!
Why did my filling crack? Usually from overbaking or cooling too quickly. Make sure to pull it out while still slightly jiggly and let it cool gradually at room temperature before refrigerating!
Can I use a pie dish instead of a tart pan? Yes — a 9-inch pie dish works! You won’t get the fluted edges but the tart will taste identical. Press the crust up the sides of the pie dish!
Can I make mini tarts? Absolutely! Use mini tart pans and reduce baking times — about 10 minutes for the crust and 12-15 minutes for the filling!
More Easy Dessert Recipes You’ll Love
This lemon tart is proof that truly elegant desserts don’t have to be complicated. One hour, simple ingredients, and the most beautiful refreshing dessert you’ve ever made. Once you try it you’ll make it every spring and summer for years to come!
Ingredients
- ¾ cup butter, at room temperature: Provides moisture and flavor to the crust. Unsalted butter is preferred to control the salt level.
- ½ cup white sugar: Sweetens the crust, creating a tender, melt-in-your-mouth texture.
- ½ teaspoon vanilla extract: Adds depth and a subtle aroma to the crust.
- 1 pinch salt: Enhances the flavors in the crust.
- 1 ¾ cups all-purpose flour: Forms the structure of the crust. Regular flour works perfectly here.
- 1 ½ cups white sugar: Sweetens the lemon filling; adjust to taste if preferred less sweet.
- 3 large eggs: Acts as a binder and gives richness to the filling.
- ½ cup freshly squeezed lemon juice: The star of the filling, providing tartness and freshness. Use fresh lemons for the best flavor.
- ½ cup all-purpose flour: Thickens the lemon filling for a creamy consistency.
- 1 tablespoon lemon zest: Gives an additional burst of lemon flavor, intensifying the citrus profile.
- 1 teaspoon confectioners’ sugar, or to taste: Optional light dusting for a touch of sweetness and visual appeal.
How to Make It
Step 1: Prepare the Crust
Preheat your oven to 350°F (175°C). In a medium bowl, cream together the butter and ½ cup sugar until light and fluffy—this aerates the mixture for a tender crust. Stir in the vanilla extract and salt. Gradually blend in the flour until a rough dough forms. Press this evenly into a 9-inch tart pan, ensuring an even thickness for uniform baking.
Step 2: Pre-bake the Crust
Bake the crust in the preheated oven for 15-20 minutes or until lightly golden. This pre-bake ensures the crust stays crisp when the filling is added. Once done, remove from oven and let it cool slightly while preparing the filling.
Step 3: Mix the Lemon Filling
In another bowl, whisk together the remaining 1 ½ cups sugar and eggs until well combined and slightly frothy. Add the lemon juice, whisking continuously to prevent curdling, then gently mix in the flour and lemon zest. This ensures the filling is smooth and zest is evenly distributed.
Step 4: Bake the Tart
Pour the lemon filling over the cooled crust, spreading evenly to cover. Bake for 20 minutes or until the filling is set with just a slight jiggle in the center. This ensures it’s fully cooked but still creamy. Cool the tart in the pan on a wire rack.
Step 5: Garnish and Serve
Once completely cooled, lightly dust with confectioners’ sugar for an elegant touch. Slice and serve to enjoy the perfect balance of tangy and sweet in every bite.
Recipe FAQs
Can I use bottled lemon juice instead of fresh?
Freshly squeezed lemon juice is highly recommended for its vibrant and natural flavor. Bottled juice can taste a bit flat and less fresh, which affects the tart’s overall taste.
How can I tell if the lemon filling is fully set?
The filling is done when it holds with a slight jiggle in the center, similar to a cheesecake. As it cools, it will continue to firm up, ensuring a creamy consistency without over-baking.
How should I store leftovers?
Leftover tart can be refrigerated in an airtight container for up to three days. Allow it to reach room temperature or enjoy it slightly chilled for the best flavor and texture.
Easy Lemon Tart Recipe (Simple & Elegant!)
Ingredients
- ¾ cup butter at room temperature: Provides moisture and flavor to the crust. Unsalted butter is preferred to control the salt level.
- ½ cup white sugar: Sweetens the crust creating a tender, melt-in-your-mouth texture.
- ½ teaspoon vanilla extract: Adds depth and a subtle aroma to the crust.
- 1 pinch salt: Enhances the flavors in the crust.
- 1 ¾ cups all-purpose flour: Forms the structure of the crust. Regular flour works perfectly here.
- 1 ½ cups white sugar: Sweetens the lemon filling; adjust to taste if preferred less sweet.
- 3 large eggs: Acts as a binder and gives richness to the filling.
- ½ cup freshly squeezed lemon juice: The star of the filling providing tartness and freshness. Use fresh lemons for the best flavor.
- ½ cup all-purpose flour: Thickens the lemon filling for a creamy consistency.
- 1 tablespoon lemon zest: Gives an additional burst of lemon flavor intensifying the citrus profile.
- 1 teaspoon confectioners’ sugar or to taste: Optional light dusting for a touch of sweetness and visual appeal.
Instructions
Step 1: Prepare the Crust
Preheat your oven to 350°F (175°C). In a medium bowl, cream together the butter and ½ cup sugar until light and fluffy—this aerates the mixture for a tender crust. Stir in the vanilla extract and salt. Gradually blend in the flour until a rough dough forms. Press this evenly into a 9-inch tart pan, ensuring an even thickness for uniform baking.Step 2: Pre-bake the Crust
Bake the crust in the preheated oven for 15-20 minutes or until lightly golden. This pre-bake ensures the crust stays crisp when the filling is added. Once done, remove from oven and let it cool slightly while preparing the filling.Step 3: Mix the Lemon Filling
In another bowl, whisk together the remaining 1 ½ cups sugar and eggs until well combined and slightly frothy. Add the lemon juice, whisking continuously to prevent curdling, then gently mix in the flour and lemon zest. This ensures the filling is smooth and zest is evenly distributed.Step 4: Bake the Tart
Pour the lemon filling over the cooled crust, spreading evenly to cover. Bake for 20 minutes or until the filling is set with just a slight jiggle in the center. This ensures it’s fully cooked but still creamy. Cool the tart in the pan on a wire rack.Step 5: Garnish and Serve
Once completely cooled, lightly dust with confectioners’ sugar for an elegant touch. Slice and serve to enjoy the perfect balance of tangy and sweet in every bite.
Notes