Red velvet cookies offer the perfect blend of chocolaty goodness and festive flair, making them an ideal treat for any gathering. These cookies are a practical choice if you need something delicious, show-stopping, and homemade without spending hours in the kitchen.
Save This Recipe! 💌
- Cuisine: American
- Prep Time: 20 minutes
- Cook Time: 11-13 minutes per batch
- Total Time: Approximately 45 minutes
- Servings: About 36 cookies
Why You’ll Love This Recipe
- Easy to make in under an hour.
- No special equipment required beyond a mixer.
- Perfectly soft and chewy texture.
- Visually stunning, thanks to their vibrant color.
Ingredients
- 3/4 cup (170g) unsalted butter, at room temperature: Provides a rich, creamy base. Substitute with margarine if needed.
- 4 ounces (115g) cream cheese, at room temperature: Adds tang and smoothness. You can use mascarpone in a pinch.
- 1 cup (200g) white sugar: Sweetens and helps achieve a delicate crumb.
- 1 cup (220g) packed dark brown sugar: Deepens flavor with molasses notes, contributing to chewiness.
- 1 teaspoon baking soda: Necessary for leavening, giving cookies a slight rise.
- 1 teaspoon kosher salt: Balances sweetness and enhances flavors.
- 2 teaspoons vanilla extract: Provides aroma and rounds out flavors.
- 1 large egg: Binds the ingredients together.
- 1 large egg yolk: Adds richness and moisture.
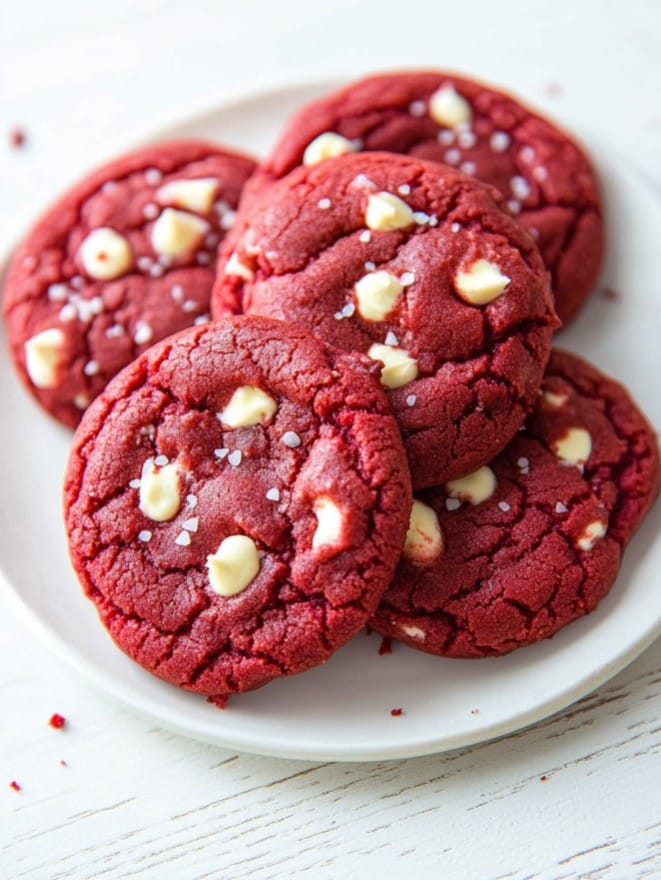
- 1 tablespoon red food coloring, preferably McCormick brand: Achieves that classic red velvet hue.
- 2 3/4 cups (385g) all-purpose flour: Forms the structure of the cookies.
- 1/4 cup (25g) natural cocoa powder (not Dutch process): Provides the chocolate flavor. Substitute with an equal amount of Dutch process but expect a darker result.
- 2 cups (340g) white chocolate baking chips, divided: Adds sweetness and visual appeal, with some reserved for topping.
How to Make It
Step 1: Preheat and Prepare Sheets
Preheat the oven to 350°F. Line two baking sheets with silicon baking mats or parchment paper to prevent sticking and ensure even baking.
Step 2: Start the Dough
In a stand mixer with a paddle attachment, combine butter, cream cheese, sugars, baking soda, salt, and vanilla. Mix on medium until creamy and uniform, about 1 to 2 minutes. This ensures even flavor distribution.
Step 3: Incorporate Eggs and Color
Scrape down the bowl, add the egg, and mix until fully incorporated. Follow with the egg yolk, then the red food coloring, mixing on low to prevent splattering. This sequence boosts richness and achieves the desired color.
Step 4: Add Flour and Cocoa
On low speed, gradually mix in flour and cocoa powder until just absorbed. This gentle approach avoids overworking the dough, keeping the cookies tender.
Step 5: Mix in the White Chips
Add 1 1/2 cups of white chocolate chips, reserving the rest. Mix slowly until they’re well distributed. These chips add pockets of creamy sweetness.
Step 6: Shape the Cookies
With moist hands, roll heaping tablespoons of dough into 1-inch balls, placing them on prepared sheets. Moisture prevents sticking and helps shape consistently.
Step 7: Bake the Cookies
Bake sheets individually for 11 to 13 minutes or until edges are set. This timing ensures a soft center and firm edges.
Step 8: Top and Cool
While still warm, press reserved white chips into cookies for an eye-catching finish. Allow cooling on sheets for 5 minutes to set before transferring to a rack. This cooling time helps them firm up slightly.
Recipe FAQs
How do I store these cookies?
Store in an airtight container at room temperature for up to a week. They can also be frozen for up to three months.
Can I double the recipe?
Yes, you can easily double the recipe. Simply ensure you have enough room in your appliance to mix larger quantities.
What can I substitute for white chocolate chips?
Semi-sweet or milk chocolate chips will offer a different but equally delicious experience. Adjust quantity based on preference.