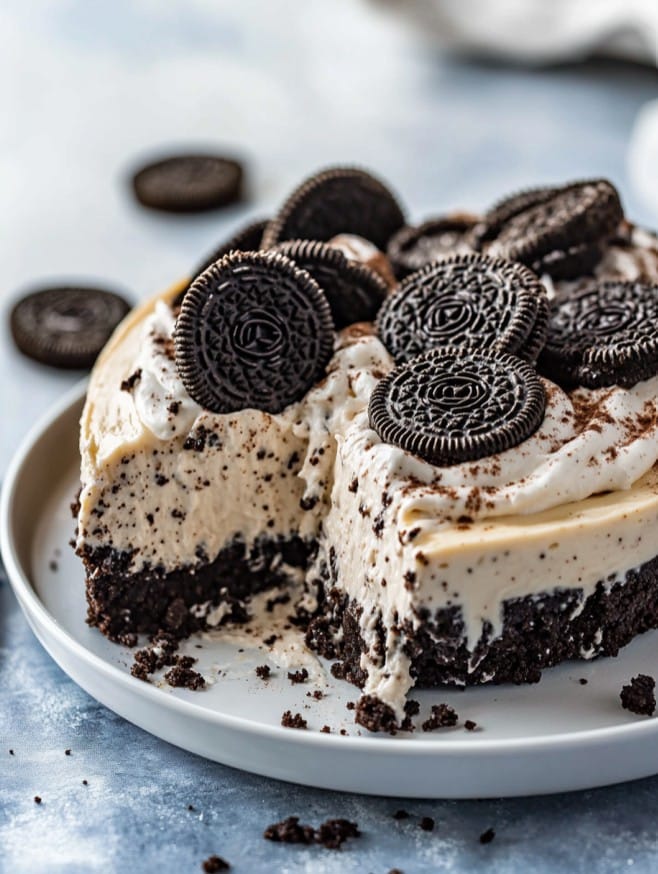
When you need a dessert that comes together without turning on the oven, this No Bake Oreo Cheesecake fits the bill perfectly. It’s creamy, rich, and loaded with cookies—all with minimal effort.
Save This Recipe! 💌
- Cuisine: American
- Prep Time: 15 minutes
- Cook Time: 0 minutes
- Total Time: 2 hours 15 minutes
- Servings: 8
Why You’ll Love This Recipe
- No baking required, making it a great choice for warm days.
- The mix of creamy cheesecake and crunchy Oreo bits offers a satisfying texture.
- It’s quick to assemble, perfect for last-minute desserts.
- Stores well, staying delicious for up to three days in the fridge.
Ingredients
- 1 Oreo Crust (or store bought): The base of our dessert, providing that classic cookie crunch.
- 8 ounces (226g) Challenge cream cheese (softened): The foundation of the cheesecake filling, providing creaminess and body.
- ¼ cup (50g) granulated sugar: Adds sweetness to balance the tang of the cream cheese.
- 1 teaspoon vanilla: Enhances the overall flavor profile with a warm, inviting note.
- 1 8 ounces container Cool Whip (plus more for garnish): Contributes to the light, airy texture of the filling. Substitute with whipped cream if preferred.
- 10 Oreos (divided): Adds texture and flavor throughout the cheesecake.
How to Make It
Step 1: Mix the Cheesecake Base
In a large bowl, use a hand mixer to beat the softened cream cheese with the granulated sugar and vanilla until smooth and creamy. This step ensures a velvety texture and helps the sugar dissolve evenly.
Step 2: Incorporate the Oreos
Chop 8 of the Oreos into coarse pieces. Mix them into the cream cheese mixture using the mixer until everything is combined. This step will integrate the Oreos and begin breaking them down, adding texture throughout.
Step 3: Fold in the Cool Whip
Gently fold in the Cool Whip using a spatula. This technique keeps the mixture light and airy, creating that melt-in-your-mouth quality.
Step 4: Assemble the Cheesecake
Spread the creamy filling into your prepared Oreo crust, smoothing the top with a spatula. Ensure the filling is evenly distributed to maintain an ideal texture when set.
Step 5: Chill and Garnish
Refrigerate the cheesecake for at least 2 hours, allowing it to set firm. Before serving, crush the remaining 2 Oreos and sprinkle them on top along with extra whipped topping for added flair and texture.
Recipe FAQs
Can I make this cheesecake ahead of time?
Absolutely! You can prepare this cheesecake up to 2 days in advance. Just keep it covered in the refrigerator until you’re ready to serve.
What if I don’t have Cool Whip?
If Cool Whip is unavailable, you can substitute with an equal amount of homemade whipped cream for a similar light and airy texture.
How should I store leftovers?
Store any leftover cheesecake in an airtight container in the refrigerator. It will stay fresh for up to 3 days, maintaining its flavor and texture.