
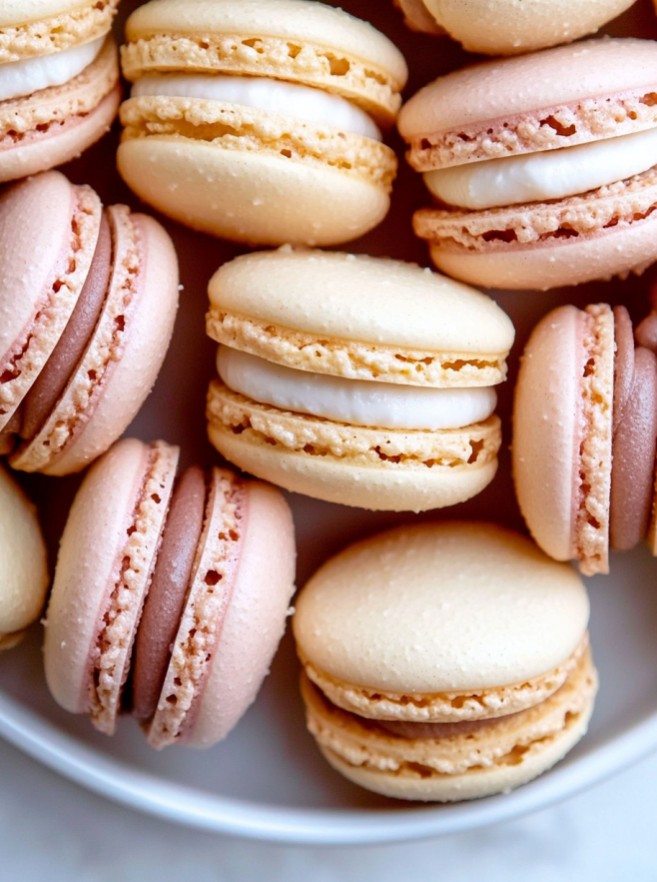
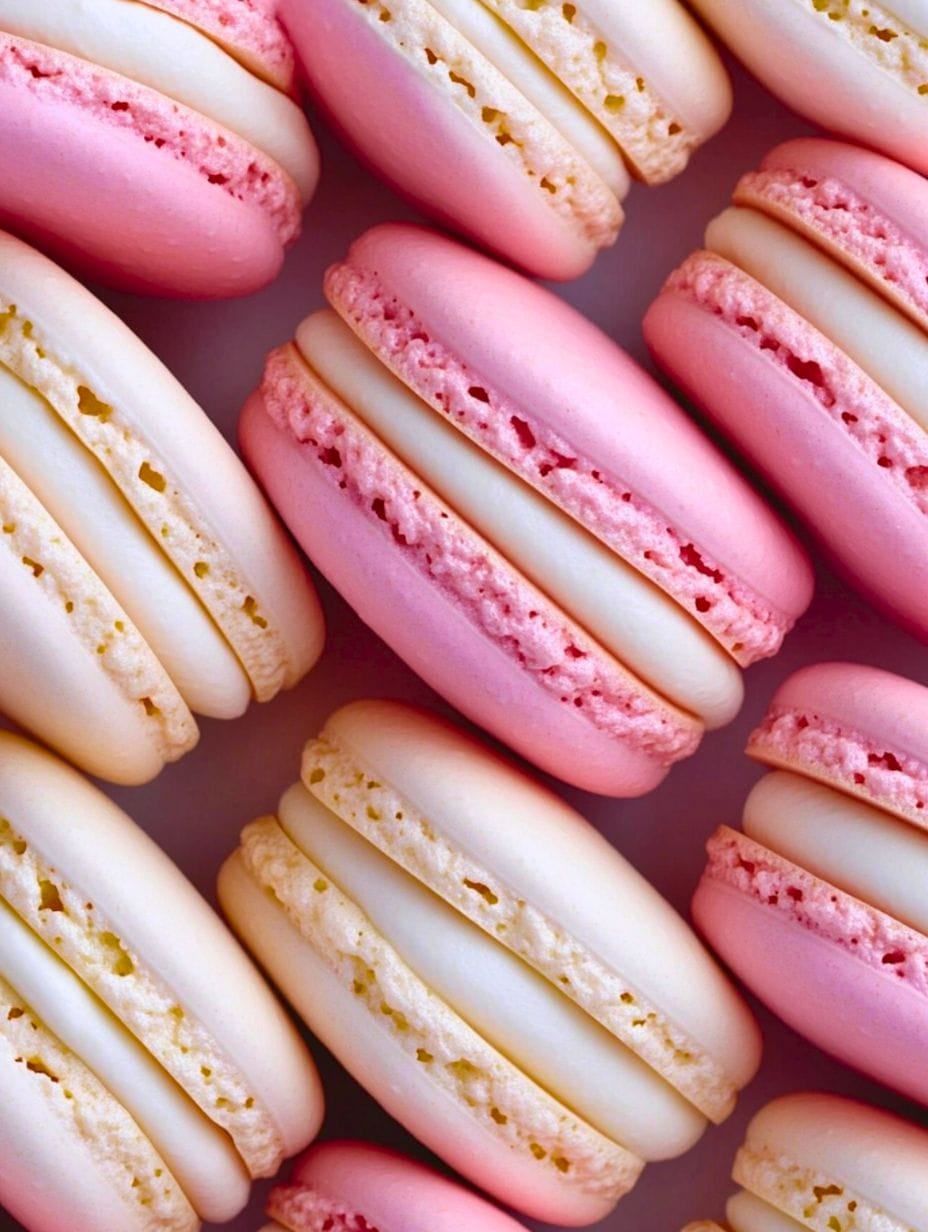
This delicate French macarons recipe creates cookies that are perfectly crisp on the outside, delightfully chewy in the center, and filled with a rich, creamy buttercream. This guide demystifies the process, breaking down every stage to ensure you can achieve bakery-quality results in your own kitchen.
Save This Recipe! 💌
Cuisine: French
Prep Time: 1 hour
Cook Time: 18 minutes
Total Time: 1 hour 20 minutes
Servings: 20 filled macarons
Why You’ll Love Making It
- Finally, a Recipe That Works! We’ve tested and refined these ratios and instructions to be as reliable and foolproof as possible, taking the guesswork out of the process.
- Achievable Luxury: Learn to master a classic French pastry that looks and tastes incredibly elegant. It’s the perfect project for a special occasion or a weekend baking session.
- The Perfect Texture: This guide focuses on achieving the signature macaron texture: a smooth, delicate shell that gives way to a soft, slightly sticky, and chewy interior.
- Detailed Troubleshooting: Our extensive FAQ section addresses the most common macaron-making pitfalls, from hollow shells to a lack of “feet,” so you can diagnose and fix any issues.
- Completely Customizable: Once you master the basic shell, you can experiment with endless color and flavor combinations for both the shells and the filling.
Here’s a great video that shows the process of making macarons.
Ingredients
For the Macaron Shells (makes approx. 40 shells / 20 filled macarons):
- 100 g super-fine blanched almond flour: This is the foundation of your macaron. Ensure it’s labeled “super-fine” and made from blanched (skinless) almonds, not “almond meal,” which is coarser.
- 100 g powdered sugar (confectioners’ sugar): Provides sweetness and structure, helping create the smooth, delicate crust.
- 75 g egg whites (from about 2 large eggs), at room temperature: The key to the meringue. “Aging” them by letting them sit in a bowl on the counter for a few hours or in the fridge overnight can help reduce moisture, but room temperature is the most critical part.
- 75 g fine granulated sugar or caster sugar: This dissolves easily into the egg whites to build a strong, stable meringue.
- ¼ teaspoon cream of tartar: An acid that helps stabilize the egg whites, making them less likely to collapse.
- ¼ teaspoon kosher salt: Balances the sweetness and enhances the overall flavor.
- 1-2 drops of gel food coloring (optional): Gel coloring is essential as it won’t add excess liquid to the batter, which can ruin the texture.
For the Classic Vanilla Buttercream Filling:
- 2 large egg yolks
- ¼ cup (50 g) granulated sugar
- 3 ½ tablespoons milk
- ½ cup (115 g) unsalted butter, softened to room temperature
- 1 teaspoon pure vanilla extract
Quick Tip: For a super-easy filling alternative, make a simple American buttercream: beat ½ cup (115 g) softened unsalted butter until creamy. Gradually add 1 ½ cups (180 g) powdered sugar, 1 teaspoon vanilla extract, and 1-2 tablespoons of milk or cream until you reach a smooth, pipeable consistency.
Instructions
Step 1: Prepare Your Workstation
Preheat your oven to 300°F (150°C) with a rack in the middle position. Line two large baking sheets with parchment paper or silicone mats. If using a template for uniform circles, slide it under the parchment paper (and remember to remove it before baking).
Step 2: Sift the Dry Ingredients (TPT)
In a medium bowl, sift the almond flour and powdered sugar together. For the smoothest possible macaron shells, sift the mixture a second time. Discard any large almond bits that remain in the sifter. This mixture is called “tant pour tant” or “TPT.”
Step 3: Make the French Meringue
In the clean, grease-free bowl of a stand mixer fitted with the whisk attachment, combine the egg whites, granulated sugar, cream of tartar, and salt. Turn the mixer on to medium-low speed (e.g., speed 4 on a KitchenAid) and whip until the mixture is foamy and opaque. Increase the speed to medium (speed 6) and continue whipping until soft peaks form (when you lift the whisk, a peak will form and then gently droop). This should take about 5-7 minutes.
If using gel food coloring, add it now. Continue to beat on medium-high speed (speed 8) until the meringue is glossy and forms stiff, straight peaks. The meringue should clump up inside the whisk and hold a sharp peak without falling over. This final stage takes another 5-7 minutes. Do not overbeat, or it will become grainy.
Step 4: Fold the Batter (The Macaronage)
Add all of the sifted dry ingredients into the bowl with the meringue. Using a flexible silicone spatula, begin to fold the batter. Scrape around the edge of the bowl and then cut through the middle. Continue this “fold-and-press” motion, pressing the batter against the side of the bowl to deflate some of the air.
Check the consistency frequently. The batter is ready when it flows off the spatula in a continuous, thick ribbon and you can draw a “figure 8” without it breaking. When a ribbon of batter is dropped back into the bowl, it should slowly melt back into the surface within 10-15 seconds. This stage is crucial—undermixed batter will be too thick and lumpy, while overmixed batter will be too thin and runny.
Step 5: Pipe the Macaron Shells
Transfer the batter to a piping bag fitted with a medium round tip (like a Wilton 2A). Hold the piping bag perfectly perpendicular (at a 90° angle) to the baking sheet and pipe 1.5-inch rounds, leaving at least 1 inch of space between each. To stop piping, cease pressure and flick your wrist in a circular motion.
Step 6: Release Air Bubbles and Rest
Firmly tap the baking sheets flat against your counter 4-5 times to release any trapped air bubbles. Use a toothpick to pop any remaining visible bubbles on the surface.
Let the piped macarons rest at room temperature for 30-60 minutes, or until they form a dry skin. This is the most important step for developing “feet” (the ruffled bottom edge). You should be able to gently touch the surface without any batter sticking to your finger. The time will vary depending on the humidity of your kitchen.
Step 7: Bake the Macarons
Bake one tray at a time on the middle rack for 15-18 minutes. To check for doneness, gently nudge the top of a shell. If it wobbles on its feet, it needs another minute or two. The finished shells should be firm and peel off the parchment easily once cooled.
Let the macarons cool completely on the baking sheet before attempting to remove them.
Step 8: Make the Buttercream Filling
While the shells cool, make the filling. In a small bowl, whisk the egg yolks and sugar until smooth and pale. Stir in the milk. Transfer the mixture to a small, heavy-bottomed saucepan. Cook over low heat, stirring constantly with a spatula, until the mixture thickens into a custard, about 5-7 minutes. Do not let it boil.
Step 9: Finish the Buttercream
Transfer the thickened custard to a bowl and let it cool completely to room temperature. Once cool, add the softened butter in three batches, beating with a hand mixer or stand mixer after each addition until incorporated. Add the vanilla extract and continue mixing until the buttercream is light, smooth, and creamy. Transfer to a piping bag.
Step 10: Fill and Mature the Macarons
Pair up the cooled macaron shells by size. Pipe a small dollop of buttercream onto the flat side of one shell. Gently press the second shell on top, twisting slightly to spread the filling to the edges.
Step 11: The All-Important Maturation
Place the filled macarons in an airtight container and refrigerate for at least 24 hours. This “maturing” process is essential. It allows the filling’s moisture to soften the inside of the shells, creating the signature chewy texture.
Bring the macarons to room temperature for about 20-30 minutes before serving for the best flavor and texture. Enjoy!
FAQs
Why did my macarons crack?
Cracks are usually caused by three things: 1) Undermixed batter that was too thick, 2) Not tapping out all the air bubbles before resting, or 3) Not resting them long enough to form a proper skin.
Why don’t my macarons have “feet”?
A lack of feet typically means the shells didn’t rest long enough and a skin didn’t form, or your batter was overmixed and too runny. It can also happen if your oven temperature is too low.
Why are my macarons hollow?
Hollow macarons are often a sign of an over-whipped meringue or an oven that’s too hot, causing the shells to rise too quickly and then collapse. Ensure your meringue has stiff, glossy peaks but isn’t dry or chunky.
Can I use a hand mixer?
Yes, but it will take longer to whip the meringue, and you’ll need to be careful not to over-whip it. If possible, a stand mixer provides more stability.
What’s the difference between almond flour and almond meal?
Almond flour is made from blanched (skinless) almonds and is ground very finely. Almond meal is coarser and often contains the skins, which will result in bumpy, dense macarons. Only use super-fine almond flour.
How should I store macarons?
Store filled macarons in an airtight container in the refrigerator for up to 5 days. They can also be frozen for up to 3 months. Let them thaw in the refrigerator and then come to room temperature before serving.
Easy Macaron Recipe
Ingredients
For the Macaron Shells
- 100 g Super-fine Blanched Almond Flour Ensure it’s labeled “super-fine” and made from blanched (skinless) almonds, not “almond meal,” which is coarser.
- 100 g Powdered Sugar
- 75 g Egg Whites About 2 large eggs. At room temperature.
- 75 g Fine Granulated Sugar or Caster Sugar
- 1/4 tsp Cream of Tartar
- 1/4 tsp Kosher Salt
- 1-2 drops Gel Food Coloring This can be optional.
For the Classic Vanilla Buttercream Filling
- 2 Large Egg Yolks
- 1/4 cup Granulated Sugar
- 3 ½ tbsp Milk
- 1/2 cup Unsalted Butter Softened to room temperature.
- 1 tsp Pure Vanilla Extract
Instructions
- Preheat your oven to 300°F (150°C) with a rack in the middle position. Line two large baking sheets with parchment paper or silicone mats. If using a template for uniform circles, slide it under the parchment paper (and remember to remove it before baking).
- In a medium bowl, sift the almond flour and powdered sugar together. For the smoothest possible macaron shells, sift the mixture a second time. Discard any large almond bits that remain in the sifter. This mixture is called “tant pour tant” or “TPT.”
- In the clean, grease-free bowl of a stand mixer fitted with the whisk attachment, combine the egg whites, granulated sugar, cream of tartar, and salt. Turn the mixer on to medium-low speed (e.g., speed 4 on a KitchenAid) and whip until the mixture is foamy and opaque. Increase the speed to medium (speed 6) and continue whipping until soft peaks form (when you lift the whisk, a peak will form and then gently droop). This should take about 5-7 minutes.If using gel food coloring, add it now. Continue to beat on medium-high speed (speed 8) until the meringue is glossy and forms stiff, straight peaks. The meringue should clump up inside the whisk and hold a sharp peak without falling over. This final stage takes another 5-7 minutes. Do not overbeat, or it will become grainy.
- Add all of the sifted dry ingredients into the bowl with the meringue. Using a flexible silicone spatula, begin to fold the batter. Scrape around the edge of the bowl and then cut through the middle. Continue this “fold-and-press” motion, pressing the batter against the side of the bowl to deflate some of the air.Check the consistency frequently. The batter is ready when it flows off the spatula in a continuous, thick ribbon and you can draw a “figure 8” without it breaking. When a ribbon of batter is dropped back into the bowl, it should slowly melt back into the surface within 10-15 seconds. This stage is crucial—undermixed batter will be too thick and lumpy, while overmixed batter will be too thin and runny.
- Transfer the batter to a piping bag fitted with a medium round tip (like a Wilton 2A). Hold the piping bag perfectly perpendicular (at a 90° angle) to the baking sheet and pipe 1.5-inch rounds, leaving at least 1 inch of space between each. To stop piping, cease pressure and flick your wrist in a circular motion.
- Firmly tap the baking sheets flat against your counter 4-5 times to release any trapped air bubbles. Use a toothpick to pop any remaining visible bubbles on the surface.Let the piped macarons rest at room temperature for 30-60 minutes, or until they form a dry skin. This is the most important step for developing “feet” (the ruffled bottom edge). You should be able to gently touch the surface without any batter sticking to your finger. The time will vary depending on the humidity of your kitchen.
- Bake one tray at a time on the middle rack for 15-18 minutes. To check for doneness, gently nudge the top of a shell. If it wobbles on its feet, it needs another minute or two. The finished shells should be firm and peel off the parchment easily once cooled.
- While the shells cool, make the filling. In a small bowl, whisk the egg yolks and sugar until smooth and pale. Stir in the milk. Transfer the mixture to a small, heavy-bottomed saucepan. Cook over low heat, stirring constantly with a spatula, until the mixture thickens into a custard, about 5-7 minutes. Do not let it boil.
- Transfer the thickened custard to a bowl and let it cool completely to room temperature. Once cool, add the softened butter in three batches, beating with a hand mixer or stand mixer after each addition until incorporated. Add the vanilla extract and continue mixing until the buttercream is light, smooth, and creamy. Transfer to a piping bag.
- Pair up the cooled macaron shells by size. Pipe a small dollop of buttercream onto the flat side of one shell. Gently press the second shell on top, twisting slightly to spread the filling to the edges.
- Place the filled macarons in an airtight container and refrigerate for at least 24 hours. This “maturing” process is essential. It allows the filling’s moisture to soften the inside of the shells, creating the signature chewy texture.