Aliquam in sagittis nulla. Curabitur euismod diam eget risus venenatis, sed dictum lectus bibendum. Nunc nunc nisi, hendrerit eget nisi id, rhoncus rutrum velit. Nunc vel mauris dolor. Class aptent taciti sociosqu ad litora torquent per conubia nostra, per inceptos himenaeos. Aliquam fringilla quis nisi eget imperdiet.
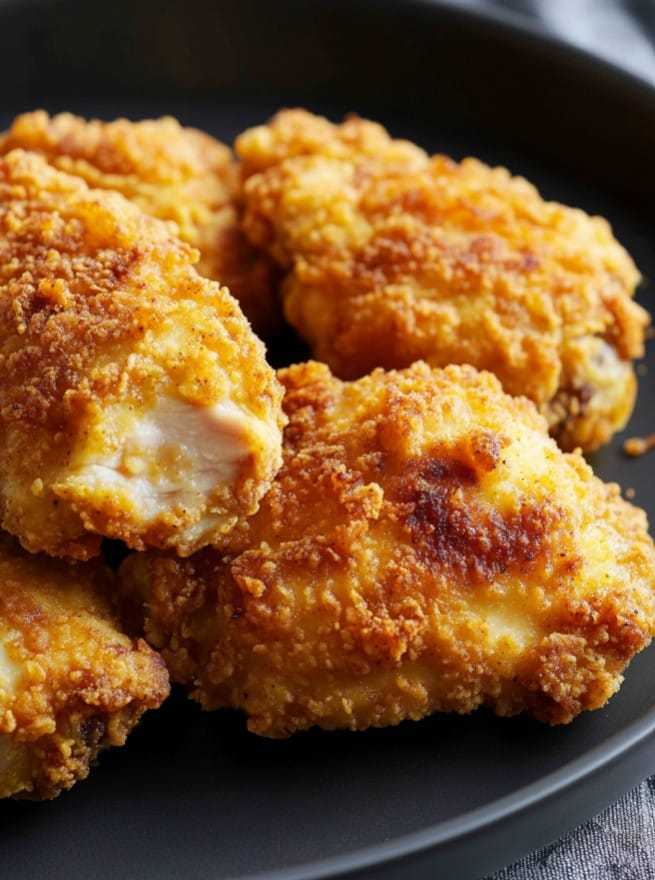
Oven-fried chicken delivers all the crispy satisfaction of traditional fried chicken with a fraction of the mess and oil. This method makes it easier to get a family favorite meal onto the table, with juicy chicken and a crunchy exterior baked right in your oven.
- Cuisine: American
- Prep Time: 15 minutes
- Cook Time: 45 minutes
- Total Time: 1 hour
- Servings: 6
Why You’ll Love This Recipe
- Less Oil: Uses much less oil compared to deep frying, making it a healthier choice.
- Simple Ingredients: Made with pantry staples you likely already have.
- Easy Cleanup: No greasy stovetop, just a baking sheet to deal with.
- Crispy Texture: Achieves that coveted crunch without the hassle of frying.
Ingredients
- 12 chicken thighs, patted dry: Ensures the seasoning and coating adhere better and provides even cooking.
- 1 cup all-purpose flour: Forms the base of the coating; provides structure and helps with crispiness.
- Salt and pepper to taste: Essential for seasoning; adjust to preference to enhance flavor.
- 1 cup Italian seasoned bread crumbs: Adds flavor and texture; substitute plain if needed, but consider adding Italian herbs.
- 3 eggs: Acts as a binding agent for the flour and breadcrumbs; holds everything together.
- ½ cup vegetable oil: Provides moisture and aids in browning; substitute with canola oil if desired.
- 1 teaspoon paprika: Adds a mild spice and a touch of color; use smoked paprika for a deeper flavor if preferred.
How to Make It
Step 1: Preheat and Prepare
Preheat your oven to 400°F (200°C). While the oven is heating, set up a breading station with three shallow dishes: one for flour mixed with salt and pepper, one for beaten eggs, and the last one for the breadcrumbs mixed with paprika.
Step 2: Coat the Chicken
Take each chicken thigh and dredge it first in the flour, shaking off any excess. This step helps create a dry surface for the egg to adhere. Dip the chicken into the egg, ensuring it is fully coated, then press into the breadcrumb mixture, ensuring even coverage. This layered coating leads to a crispier texture.
Step 3: Arrange and Drizzle
Place the coated chicken thighs on a baking sheet lined with parchment paper. Drizzle or lightly spray with vegetable oil to promote even browning in the oven. This minimal amount of oil also prevents sticking and enhances the crispiness.
Step 4: Bake to Perfection
Bake in the preheated oven for 45 minutes, turning the chicken halfway through. The internal temperature should reach 165°F (74°C). Look for a golden, crispy crust and clear juices. Adjust baking time as necessary depending on the size of the chicken pieces.
Recipe FAQs
Can I use chicken breasts instead of thighs?
Yes, chicken breasts can be substituted, but keep in mind that they may require a slightly shorter cooking time to avoid drying out. Check for doneness at around the 35-minute mark.
Do I need to flip the chicken while baking?
Flipping halfway through baking helps ensure even cooking and crispness on all sides. It’s an important step for achieving the best texture.
What is the best way to store leftovers?
Store any leftovers in an airtight container in the refrigerator for up to 3 days. Reheat in the oven at 350°F (175°C) for about 15 minutes to retain crispiness.